Bread
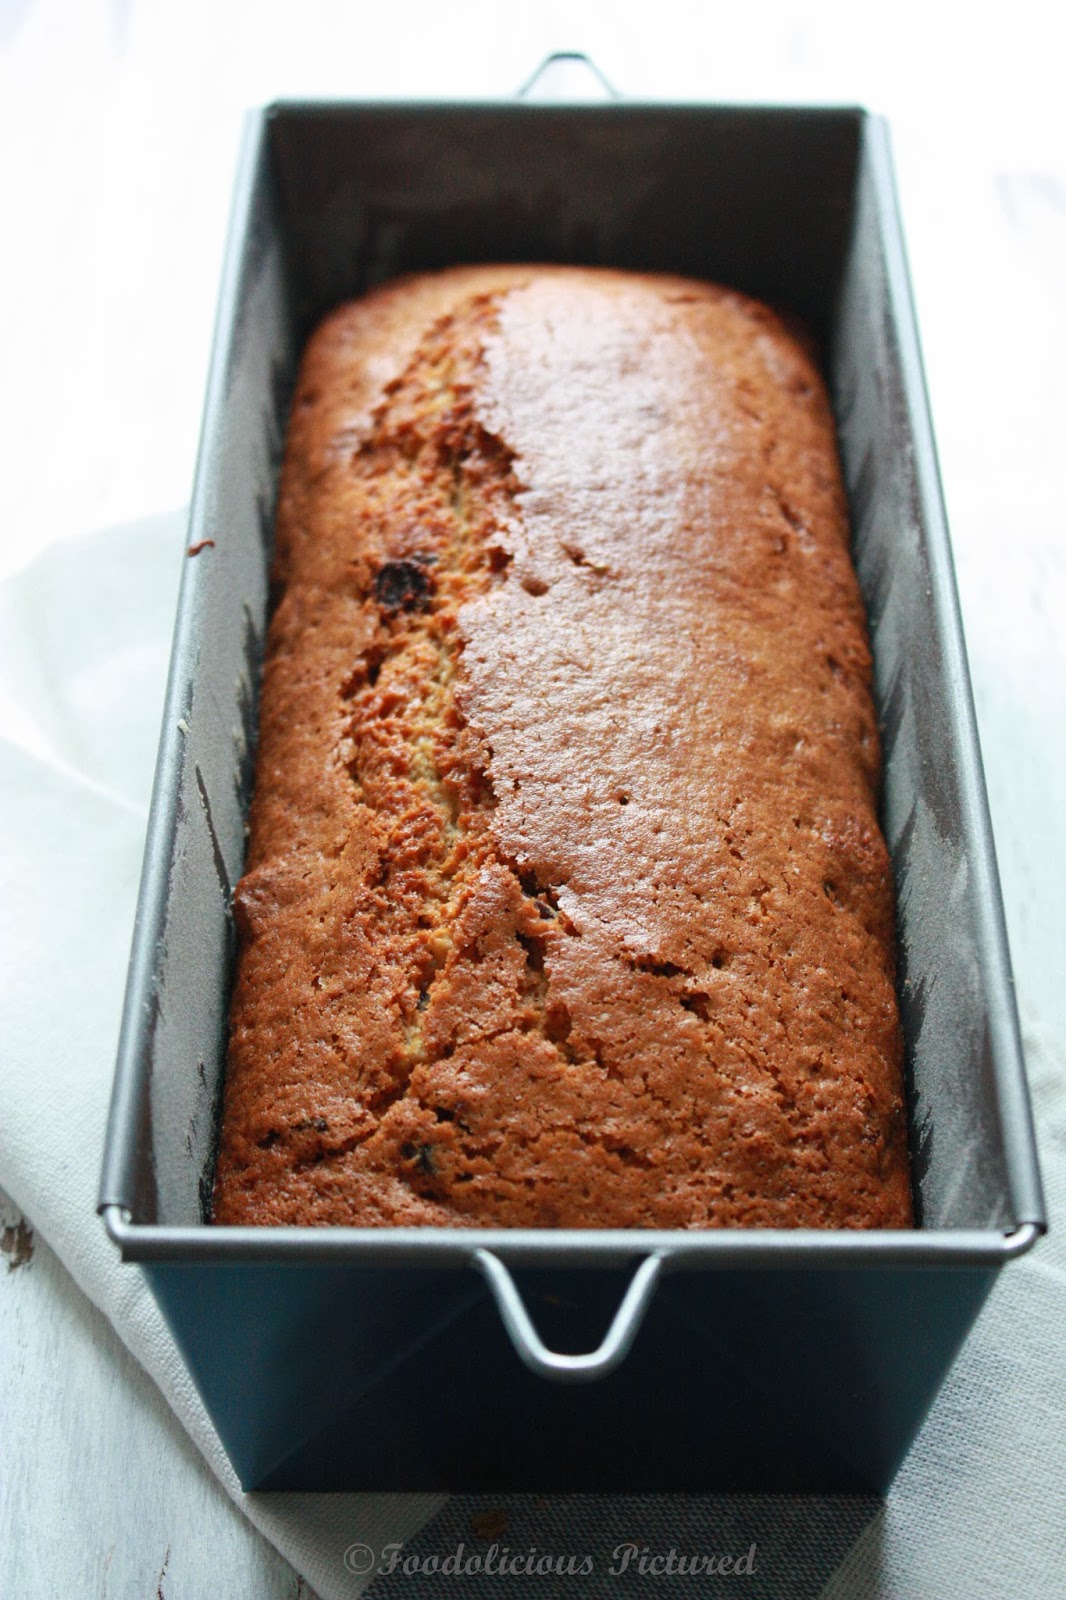
Banana and candied fruits loaf

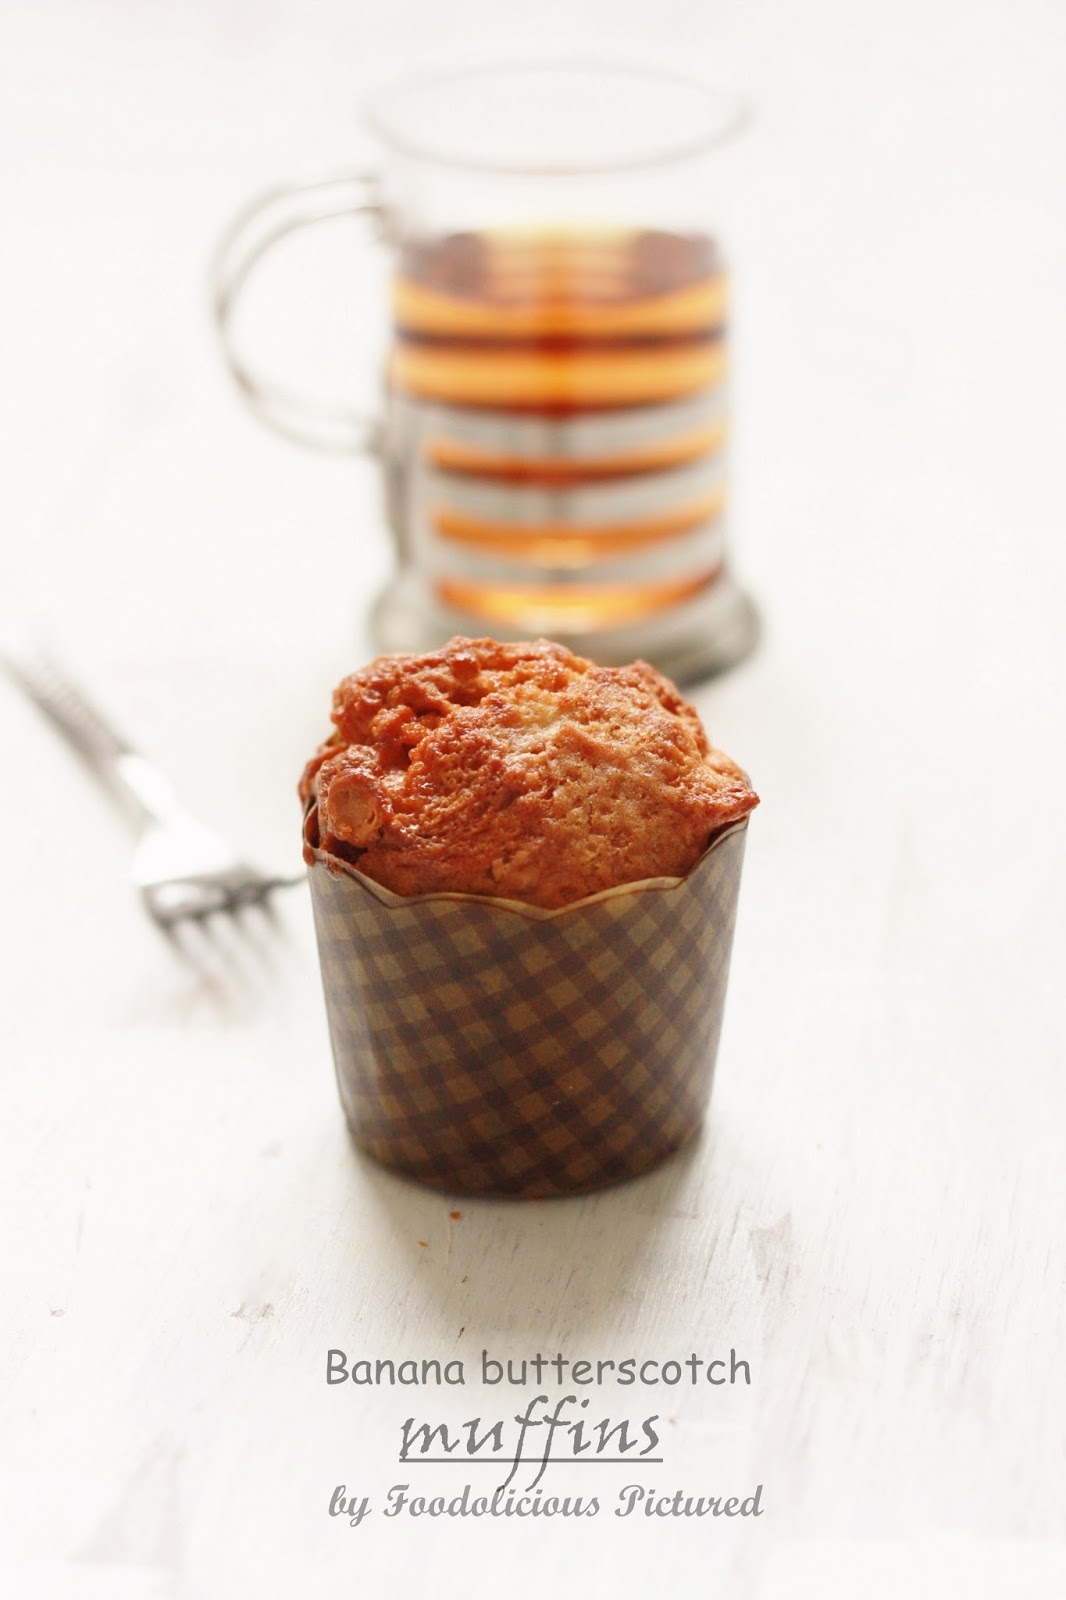
Banana butterscotch muffins
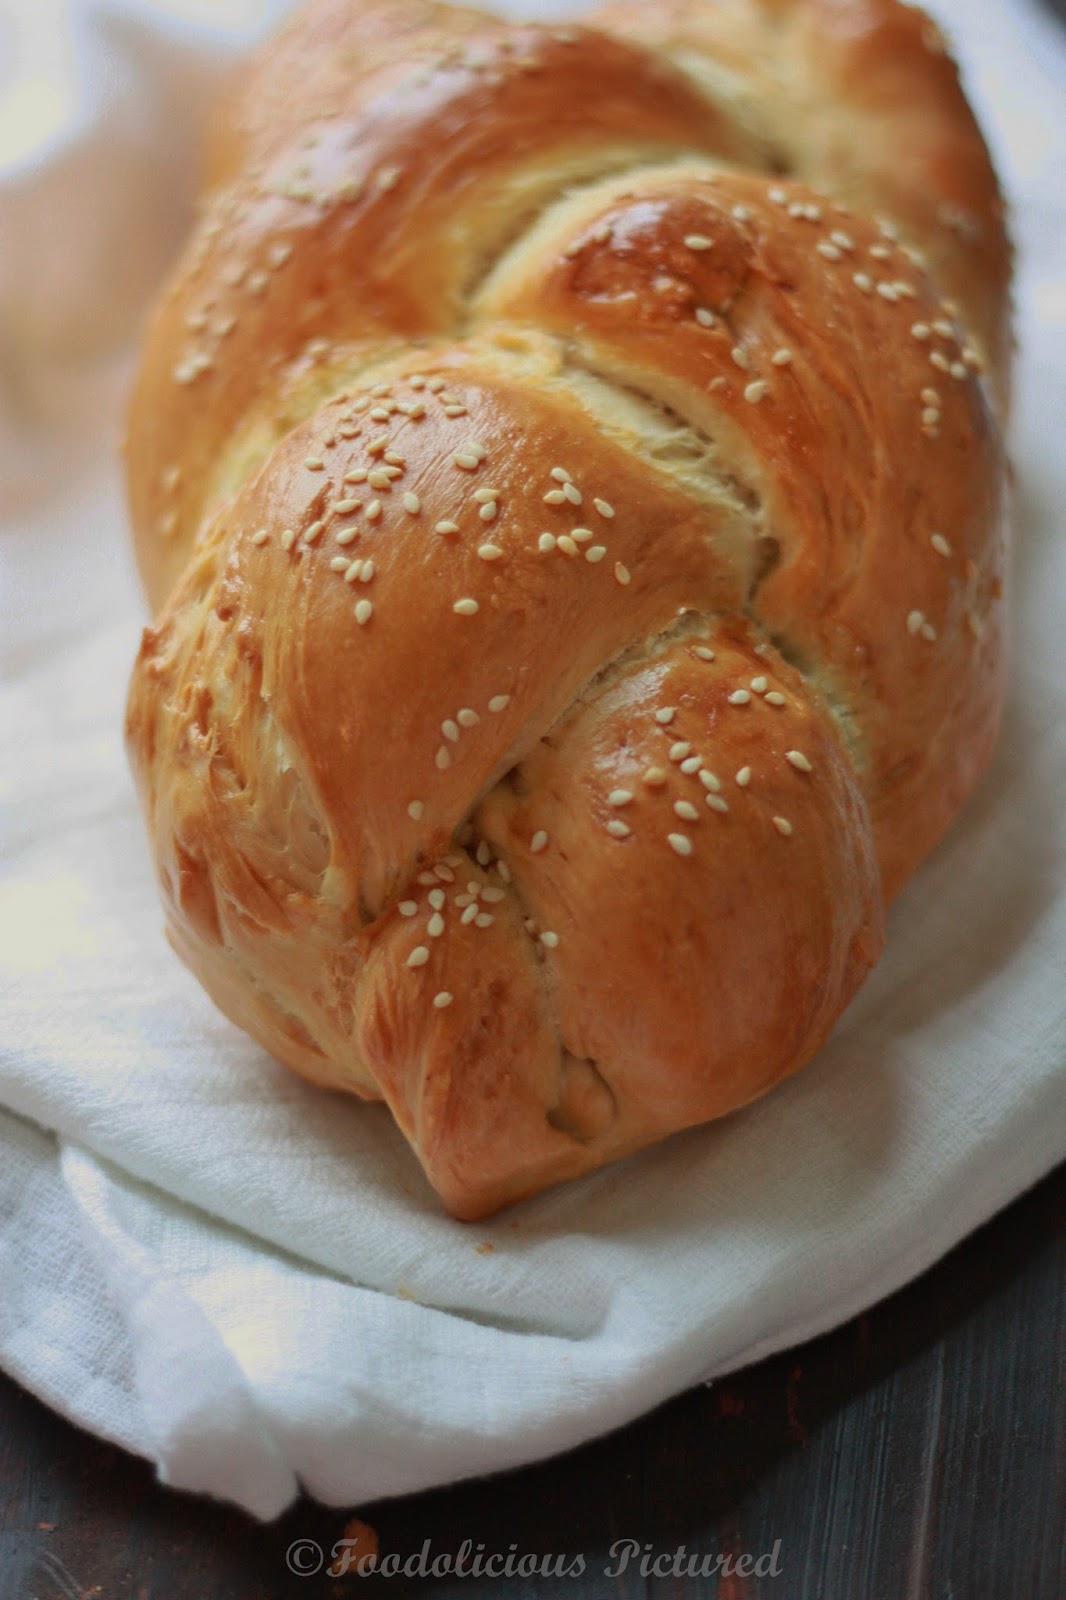
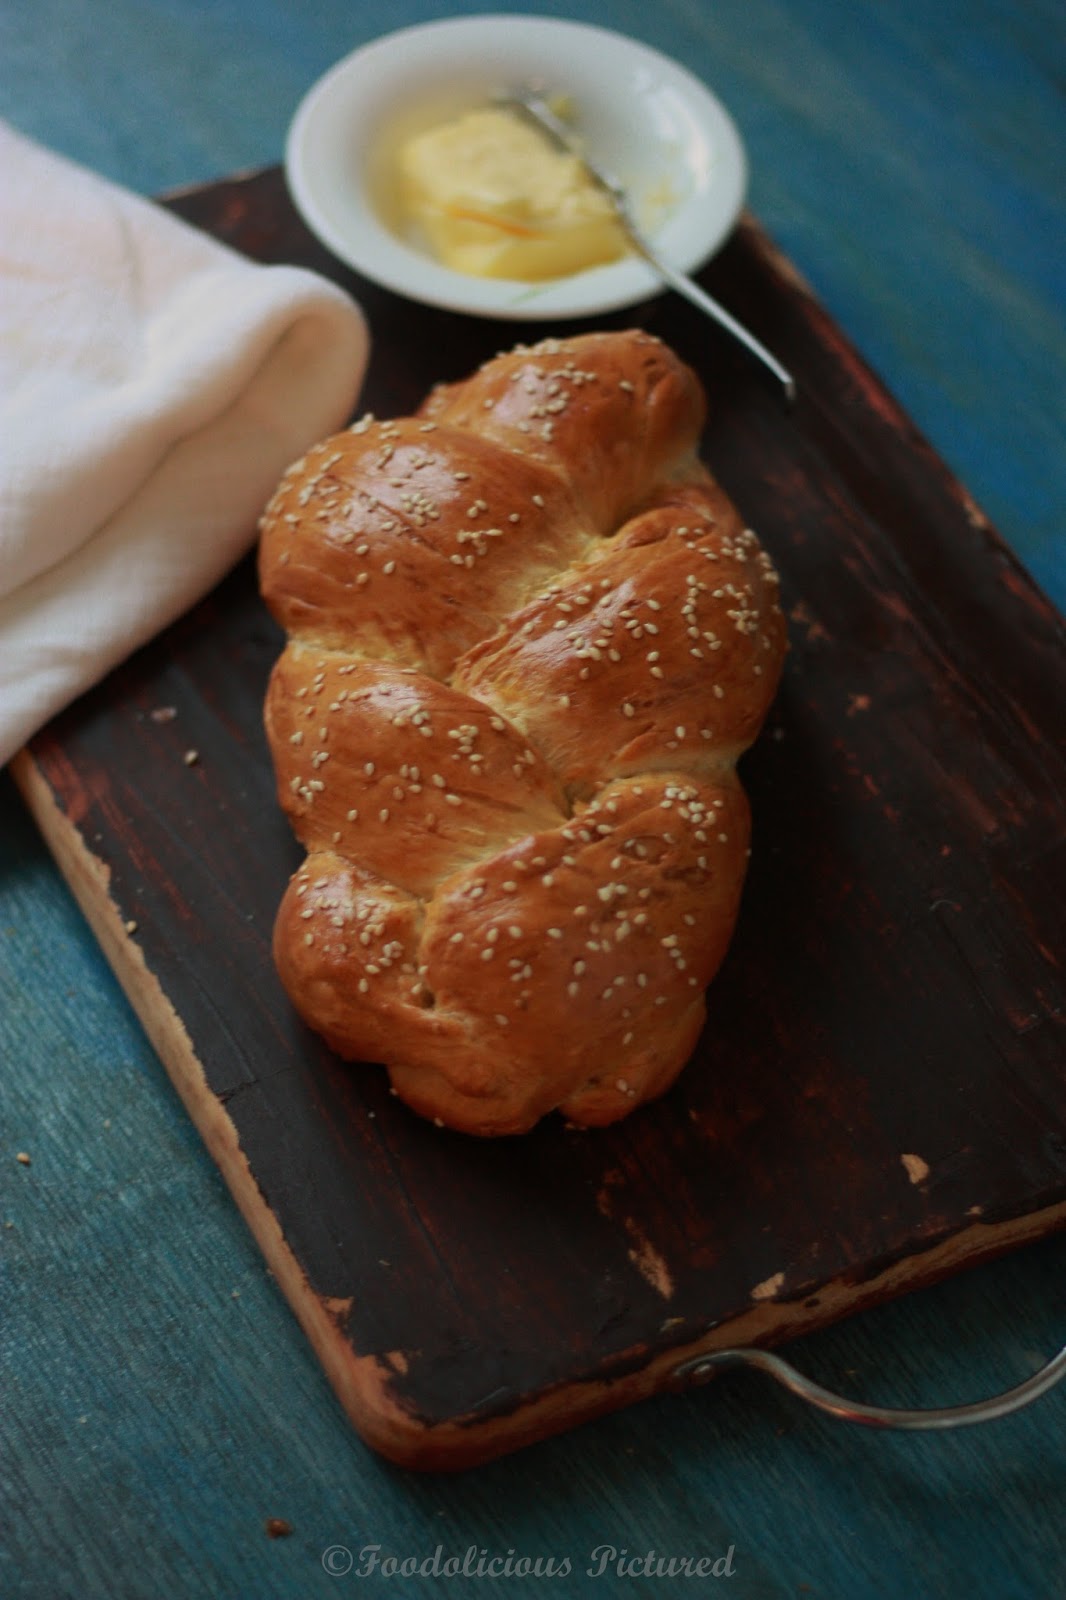
Challah–Jewish bread
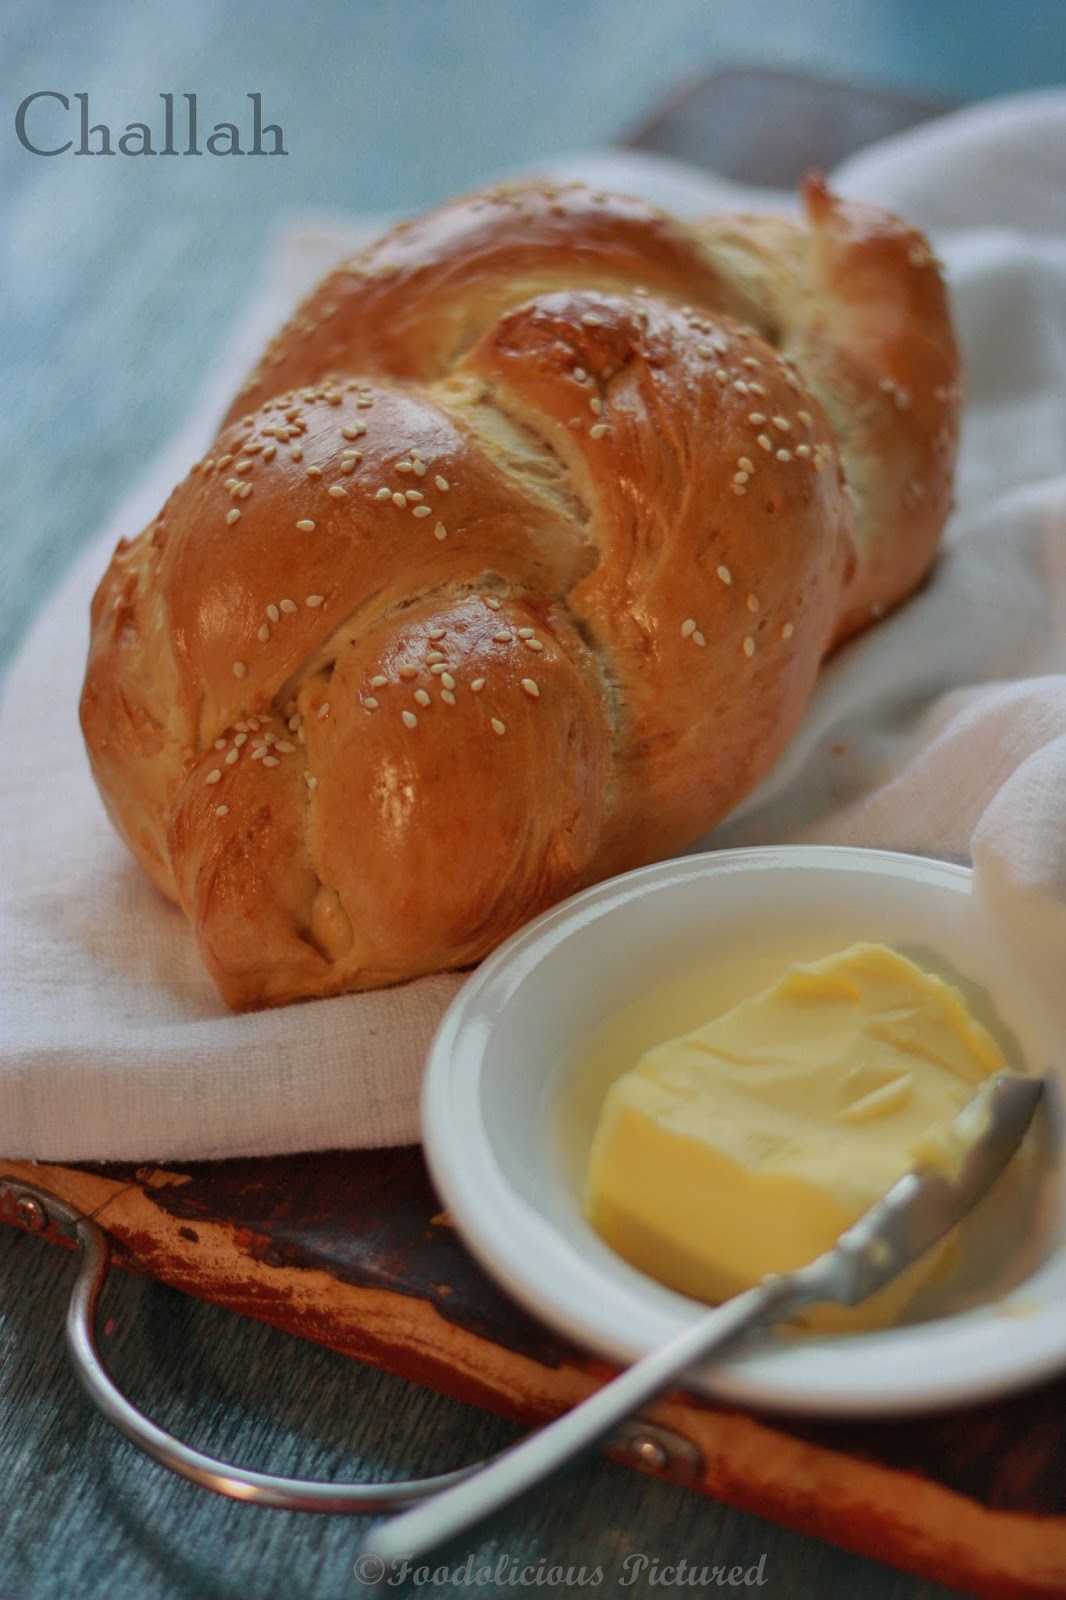
Challah is a traditional braided Jewish bread that is served at celebrations. A special loaf served for the Jewish Shabbat. To read more on of the bread click here
The recipe here makes 2 loaves.
Recipe source – Jewish cooking
You need –
- Dried yeast – 1 tablespoon
- Sugar – 1 tablespoon
- Lukewarm water – 1 cup
- Bread flour – 4.5 cups plus extra as needed
- Vegetable oil – 2 tablespoons
- Egg – 2, lightly beaten
For glazing –
- Sugar – 1 teaspoon
- salt – 1/2 teaspoon
- Egg – 1
- Sesame seeds/poppy seeds – for sprinkling
How to –
In mixing bowl add the yeast, tablespoon of sugar and 120 ml (1/2 cup) of lukewarm water.
Mix together and sprinkle a little flour on top. Cover and leave for about 15 minutes or until the bubbles appear on the surface.
Now to the yeast mixture add the salt, oil and eggs and mix well. Gradually add the flour and knead for 5-10 minutes until the mixture forms a soft dough. If the dough is too sticky then add little more flour or if its too dry then add lukewarm water as required and knead again.

In large oiled bowl, place the dough; cover with a plastic wrap and leave it in warm place to double in size for about 1-2 hours. Once the dough has doubled in size; turn it to a lightly floured surface, punch and knead gently for 5-6 minutes. Turn to the bowl and let it sit covered again for 1-2 hours or till double in size.

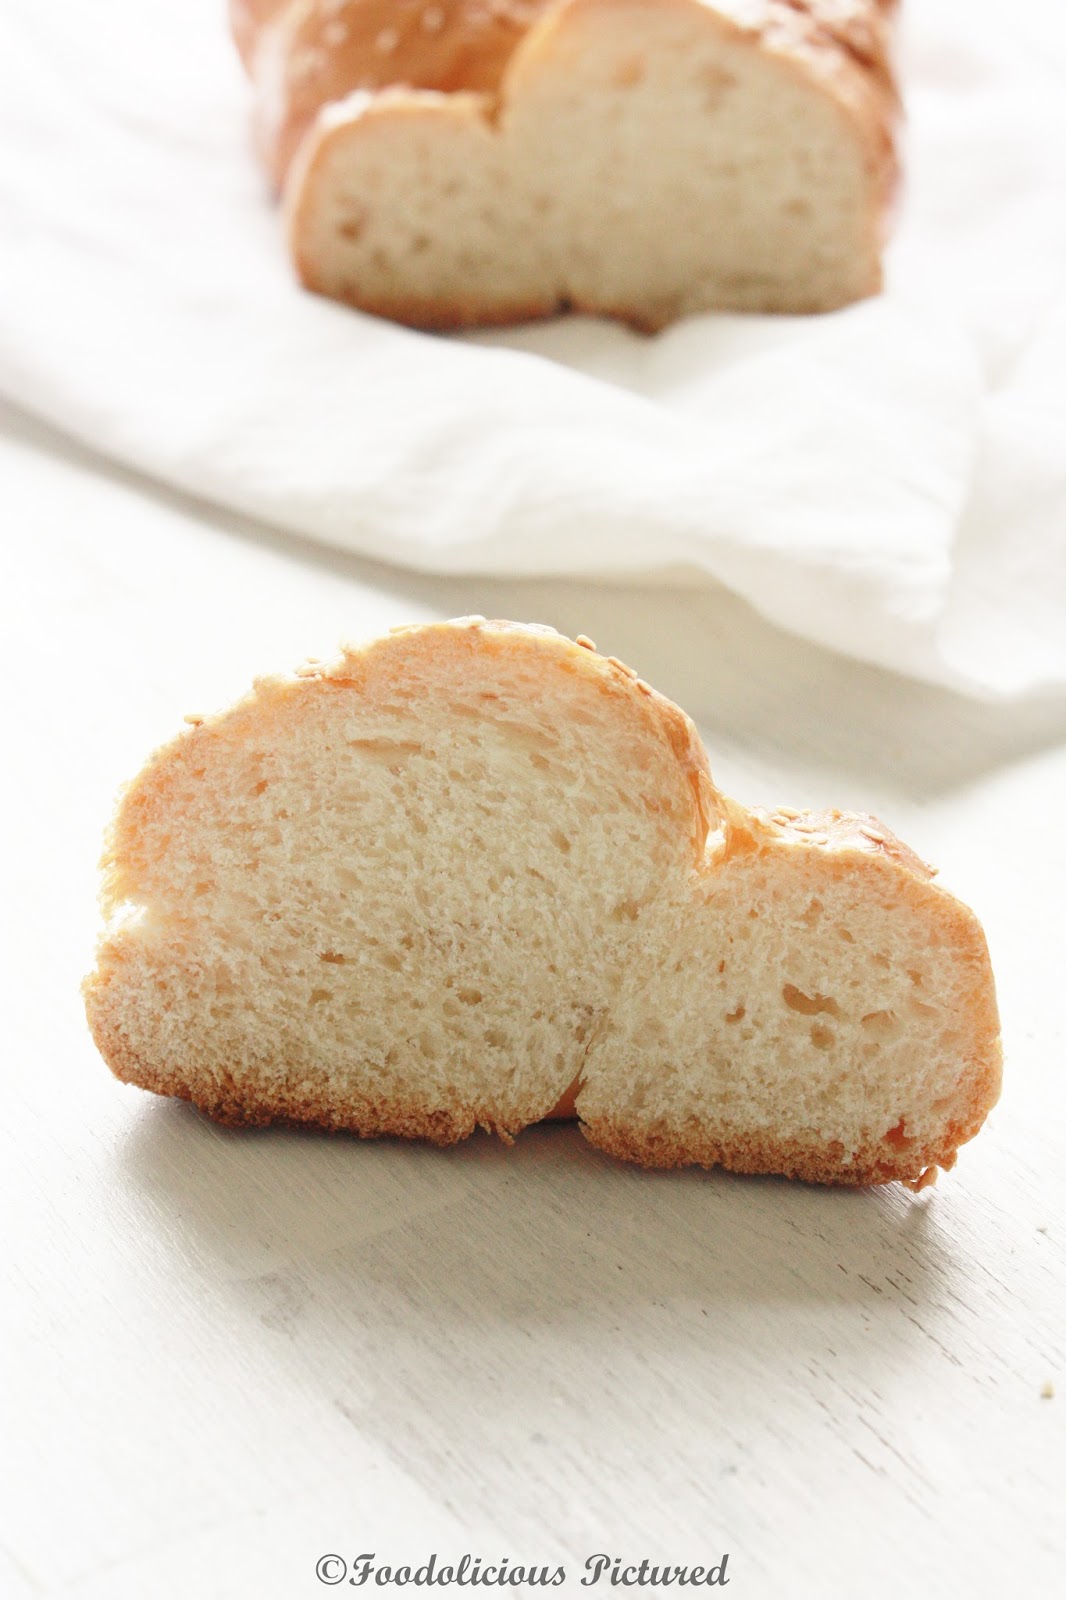
Turn the dough into a lightly floured surface and divided into 2 equal pieces. Then divide each piece into 3 equal pieces. Roll each into a long sausage shape. Pinch the ends of the 3 pieces together, then braid into a loaf (just like braiding hair). Pinch the ends again and place them on the baking tray lined with parchment paper. Cover with a clean kitchen towel and let it sit in a warm place to double in size.

Pre- heat the oven to 180 C.
For glazing – beat the egg, sugar and a pinch of salt. Brush over the loaf and sprinkle the sesame seeds or poppy seeds.
Bake for 35-40 minutes or till well browned. Leave on wire rack to cool.

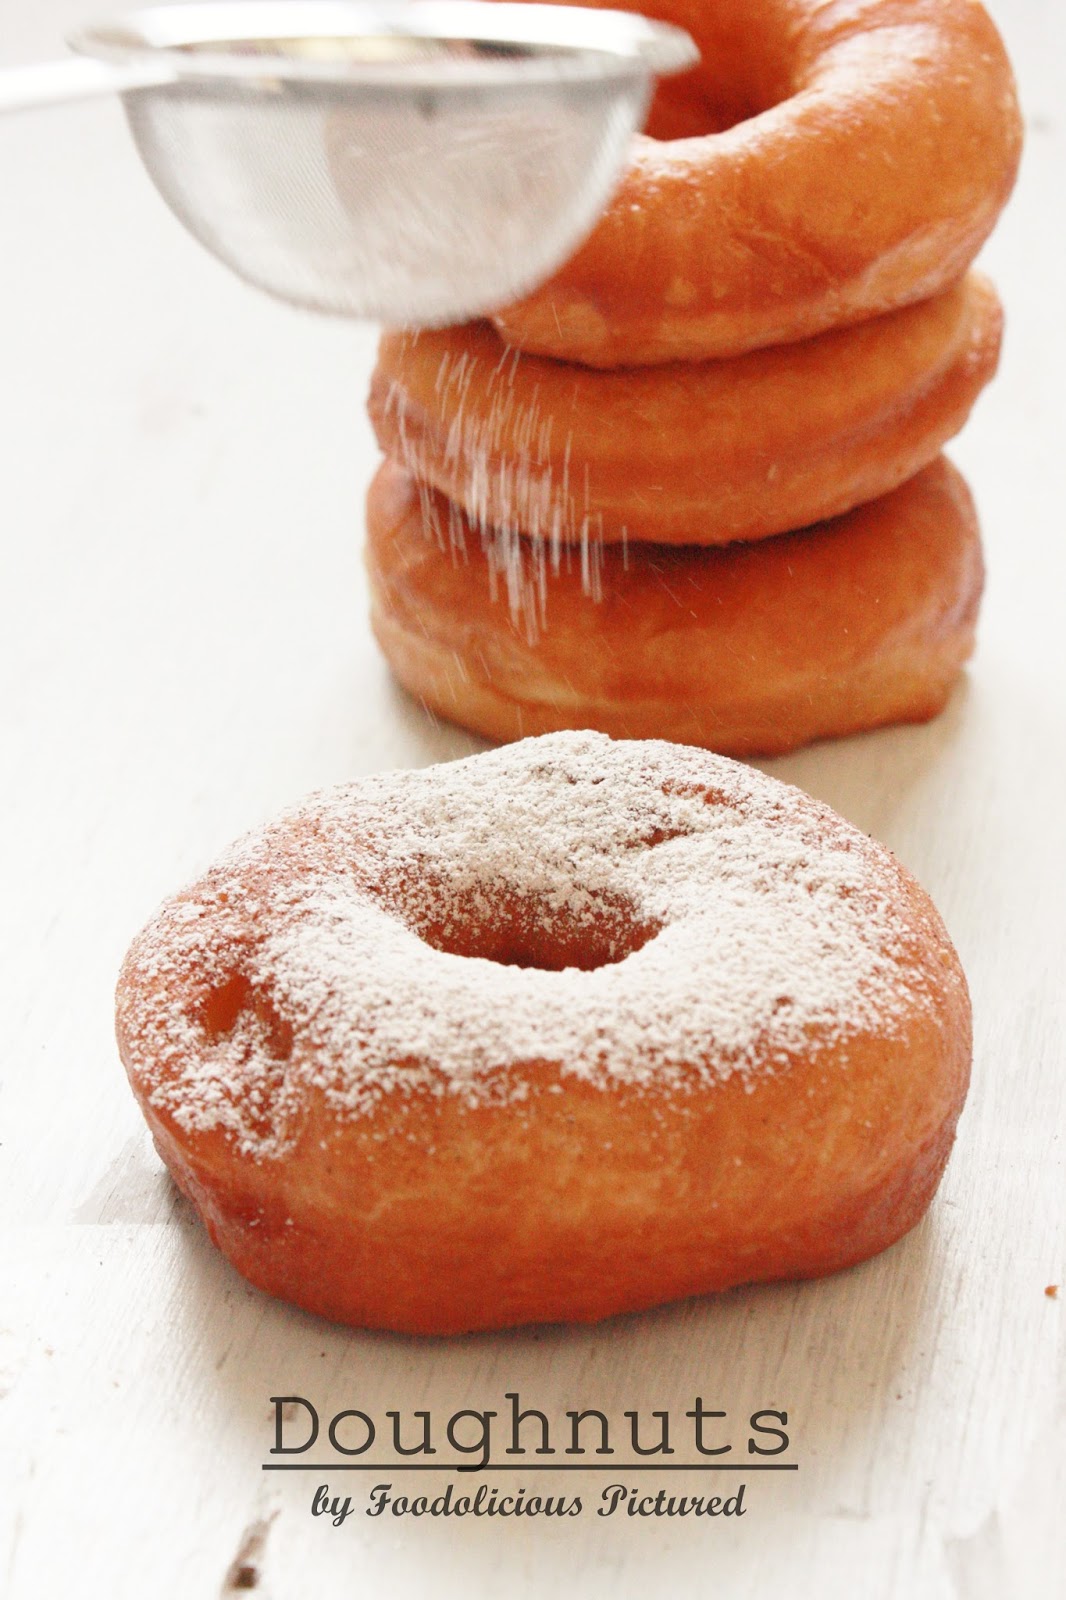
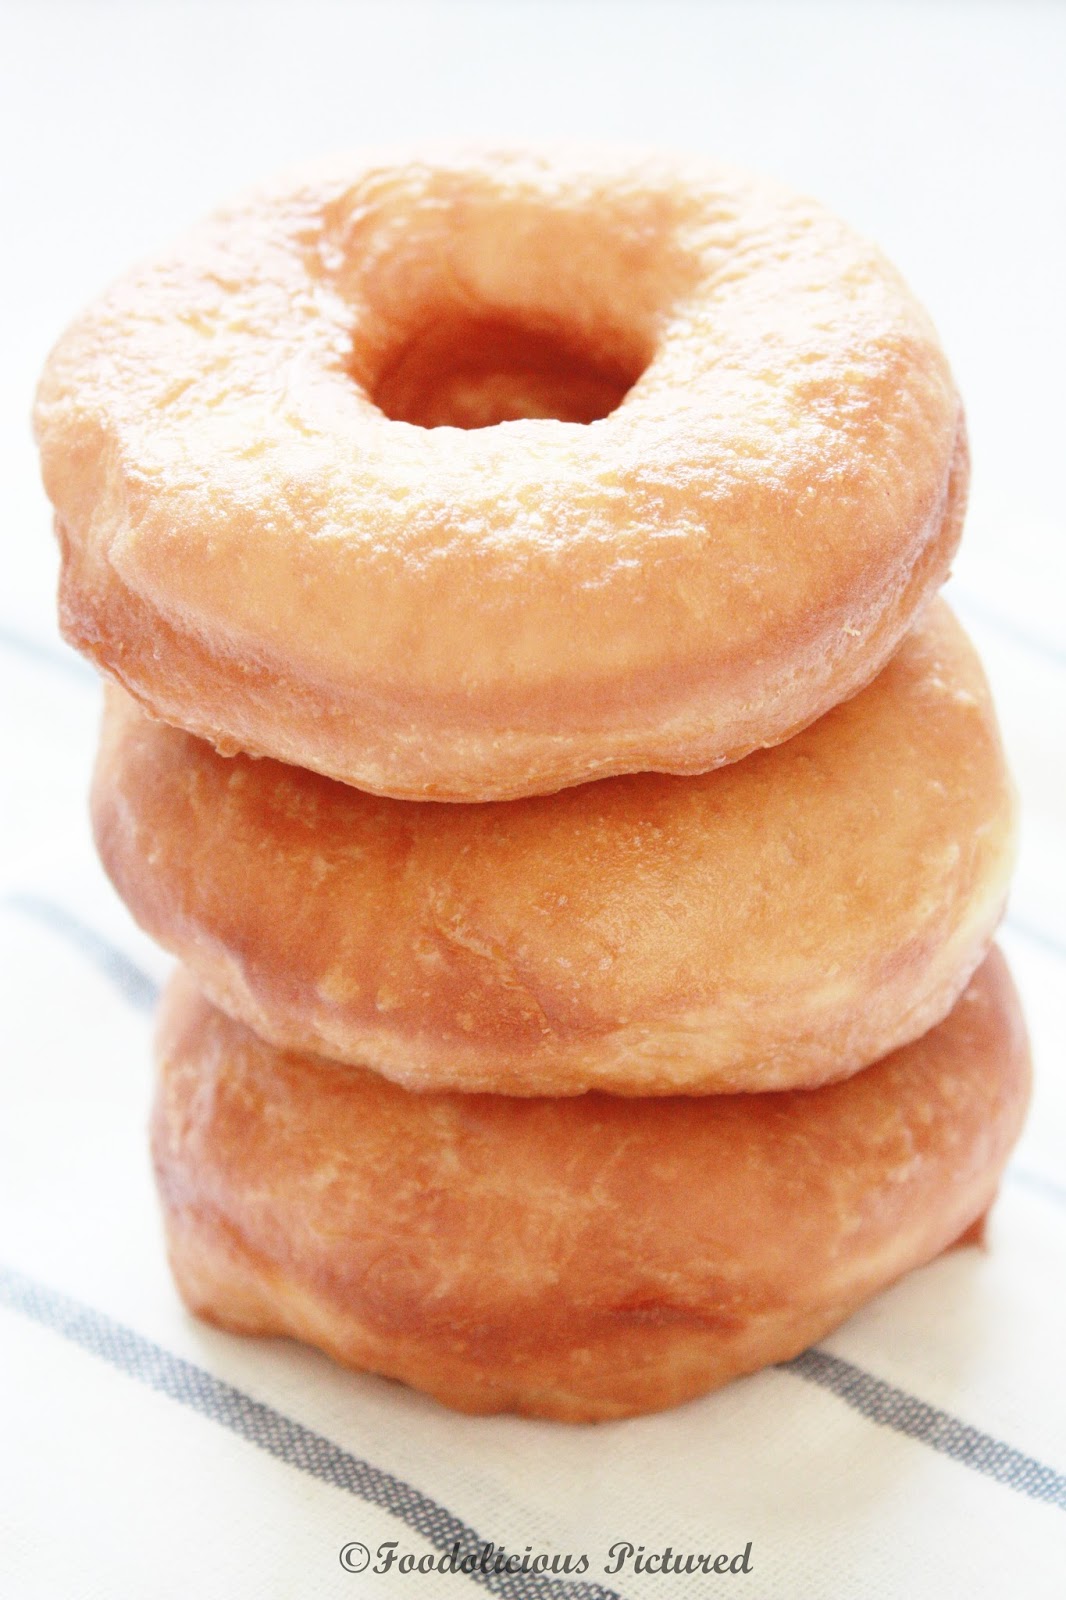
Doughnuts
Recipe source – http://www.gourmettraveller.com.au
You need –
- Dried yeast – 14 gram
- Lukewarm milk – 350 ml,
- caster sugar – ½ cup
- Eggs – 2, at room temp
- butter – 80 grams , cut into small cubes
- Plain flour – 680 grams
- Vegetable oil – For deep frying

How to –
In bowl, stir the yeast in 60 ml of lukewarm water. Set aside for 10 minutes or till foamy.
In a mixing bowl add the sugar, eggs, yeast, butter and half the flour. Using a dough hook attachment, knead till well combined. Add the remaining flour and continue to work till it forms a sticky dough.
 |
| Yeast |
Put the dough onto a lightly floored surface and lightly knead the dough. Butter a bowl and transfer the dough to the bowl. Cover with a cling wrap and let it sit in a warm place to raise in double in size (it took about an hour for me).

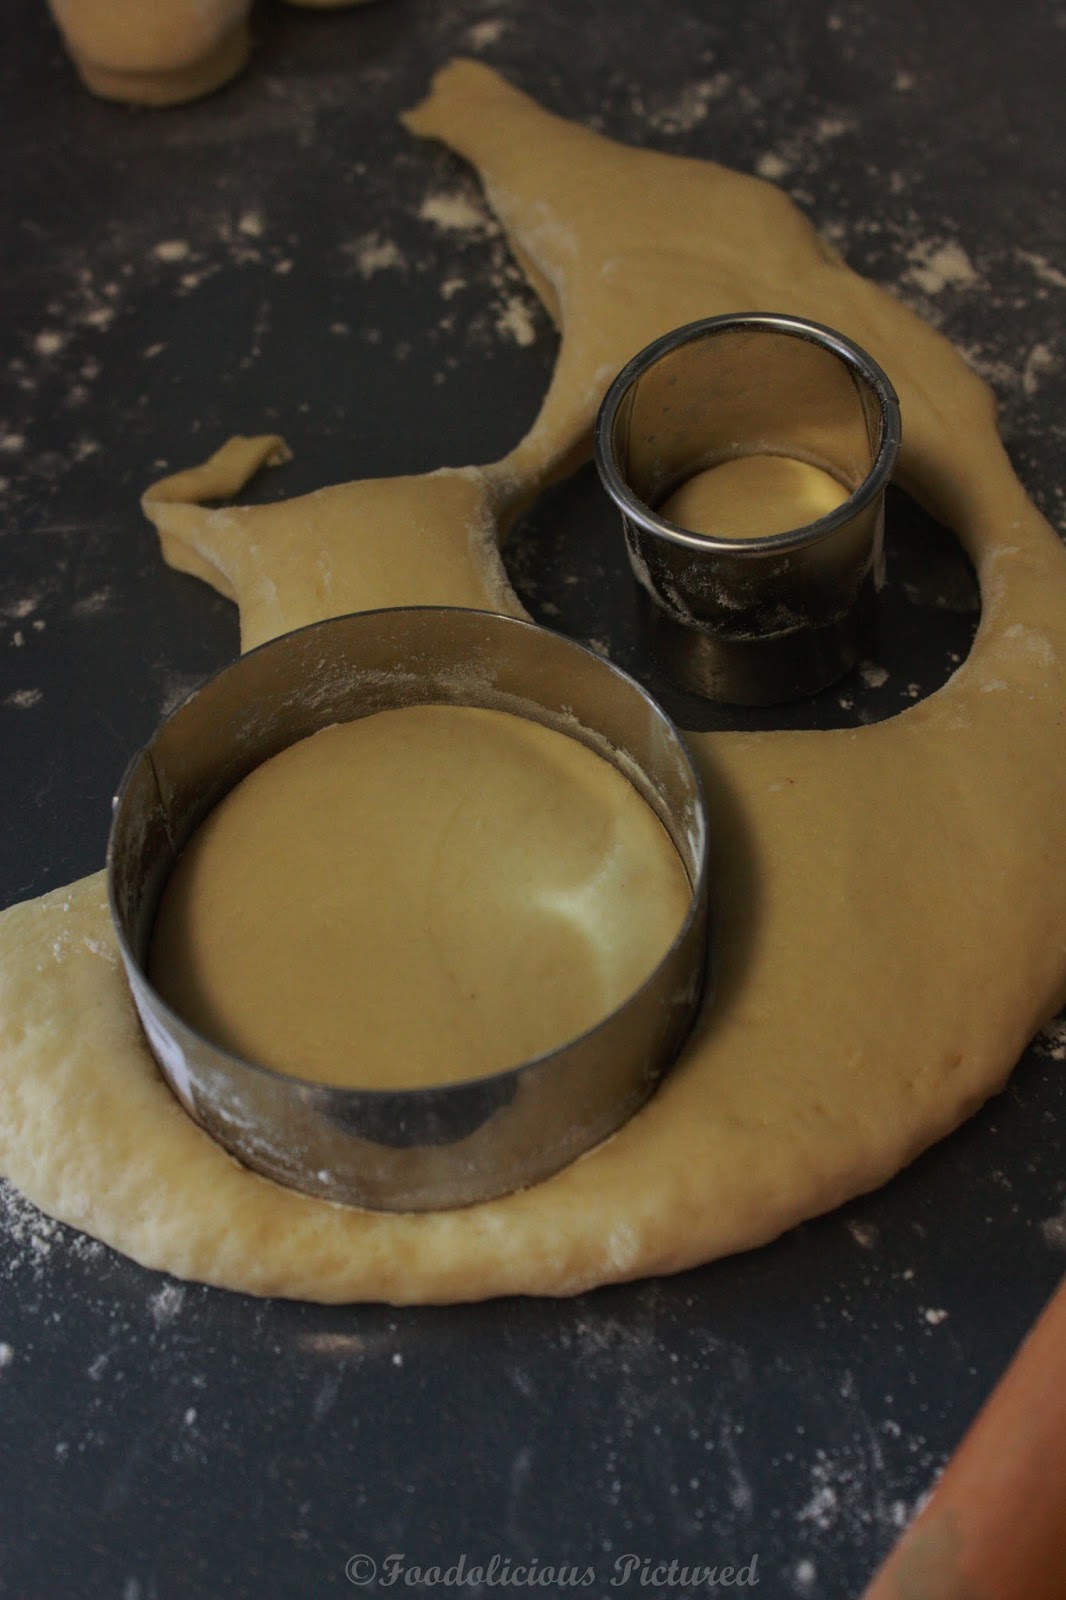
Once the dough has raised in double turn in back to a flour surface and roll out to a 1.5 cm thick. Using a doughnut cutter or use a 8 cm diameter cutter, then cut out holes with a 2 cm diameter cutter.

Place the cut dough on tray lined with baking paper with at least 2 cm gap between each. Cover with cloth and let it sit till the dough raises in double (took 30 minutes for me).

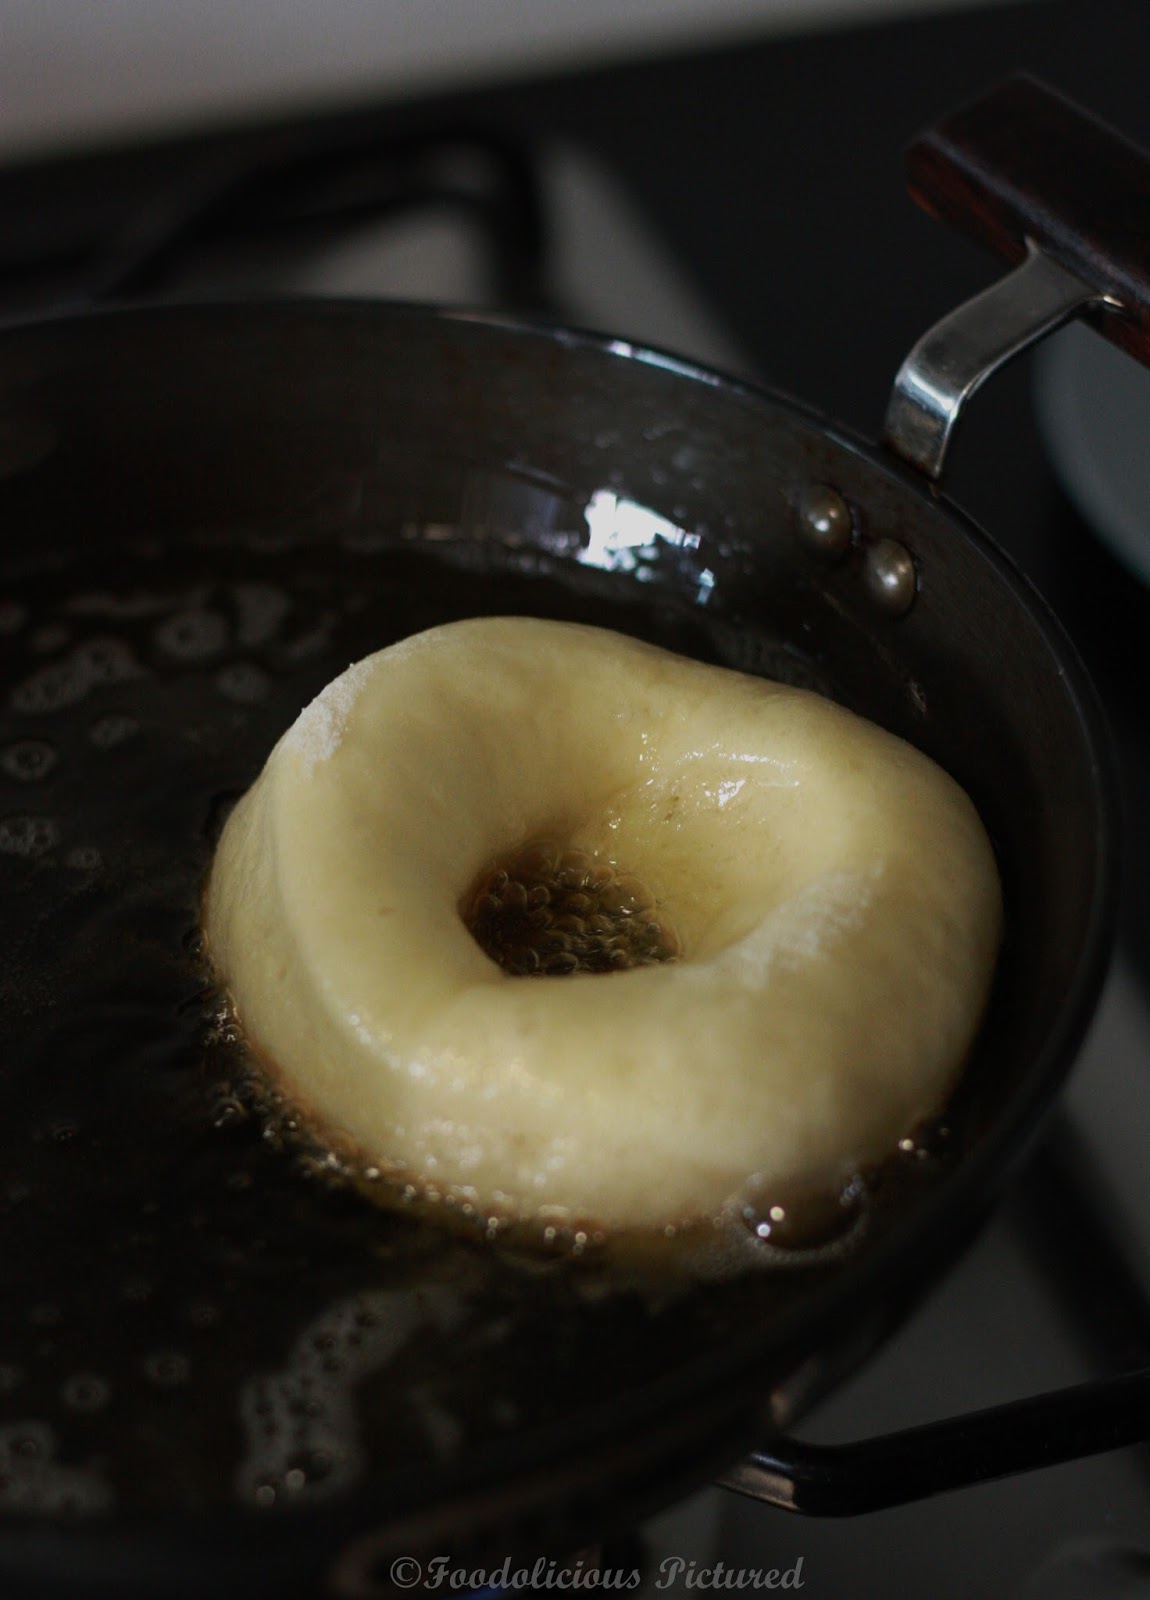
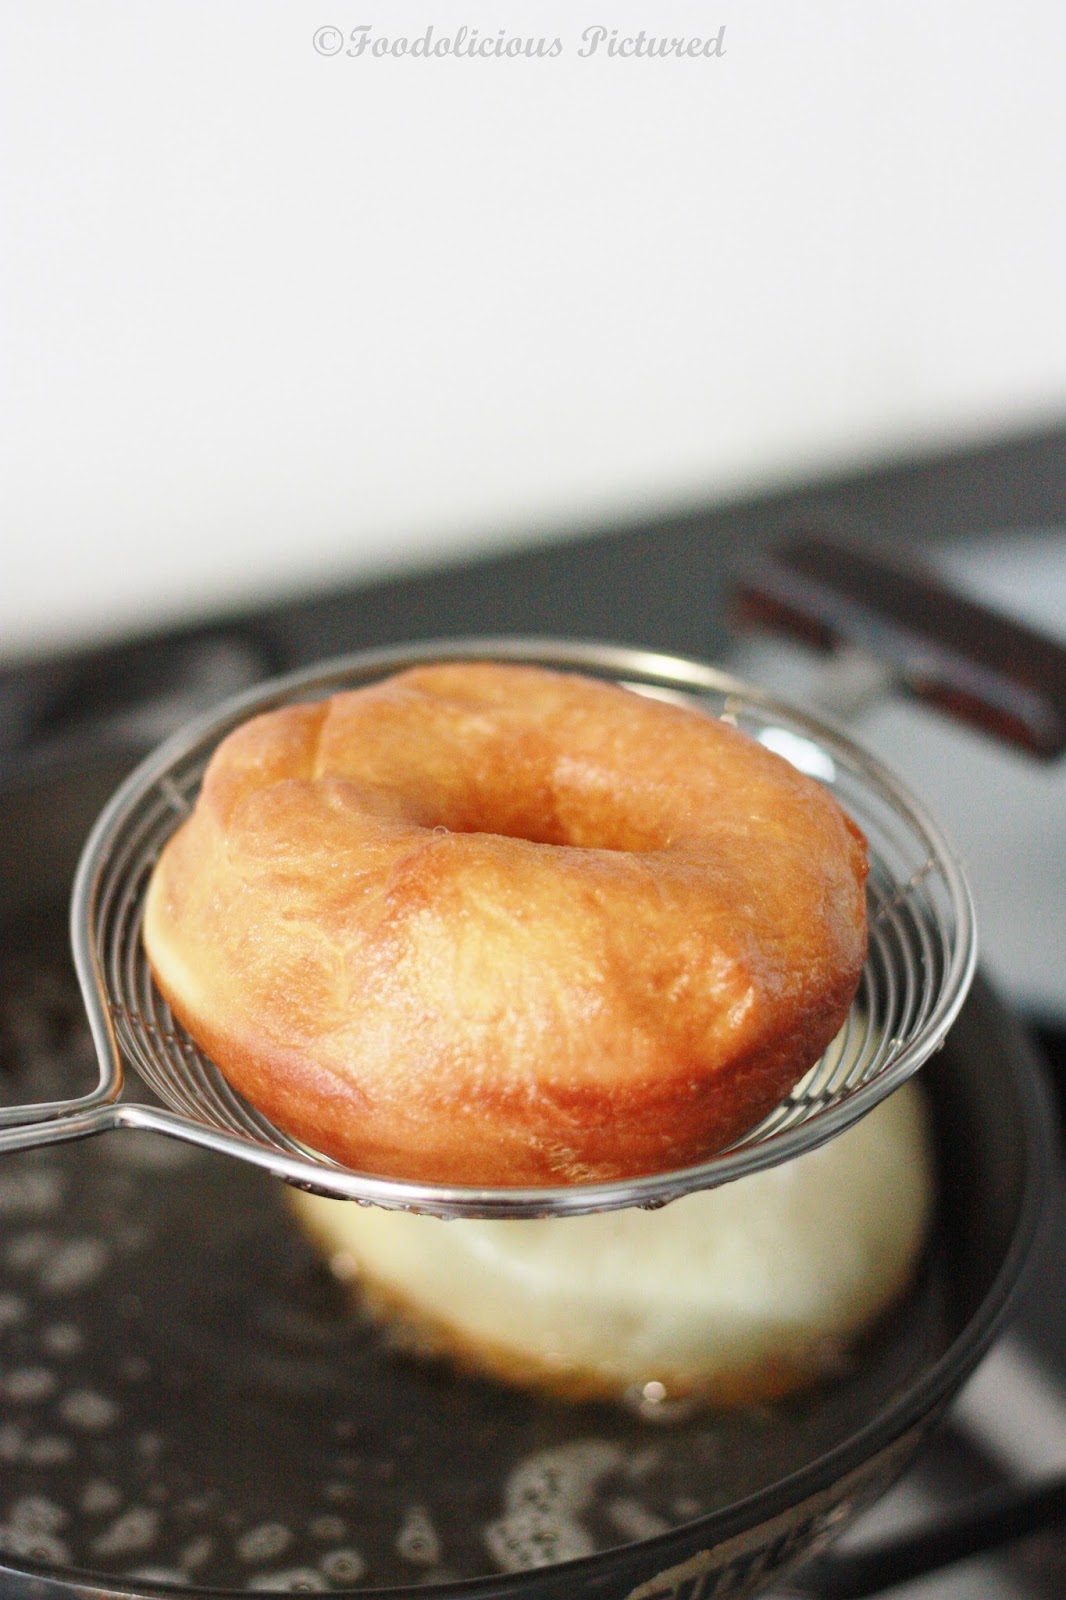
In a deep frying pan, heat the oil required for deep frying. Once the temperature is 180c; deep fry the doughnuts in batches till they are cooked through and golden brown. Drain on a paper towels.
Sprinkle with powdered sugar, cinnamon-sugar mixture or with chocolate glaze.


Note –
- If you are not sure if your yeast is still active, them prefer you do a proof test before you start of with the other ingredients Take the lukewarm water ( please make sure the water is not hot. Otherwise your yeast will die). Stir in the yeast along with a pinch of sugar and set aside for 10 minutes. If the form and bubbles foam on top in 10 minutes then your yeast is still active.
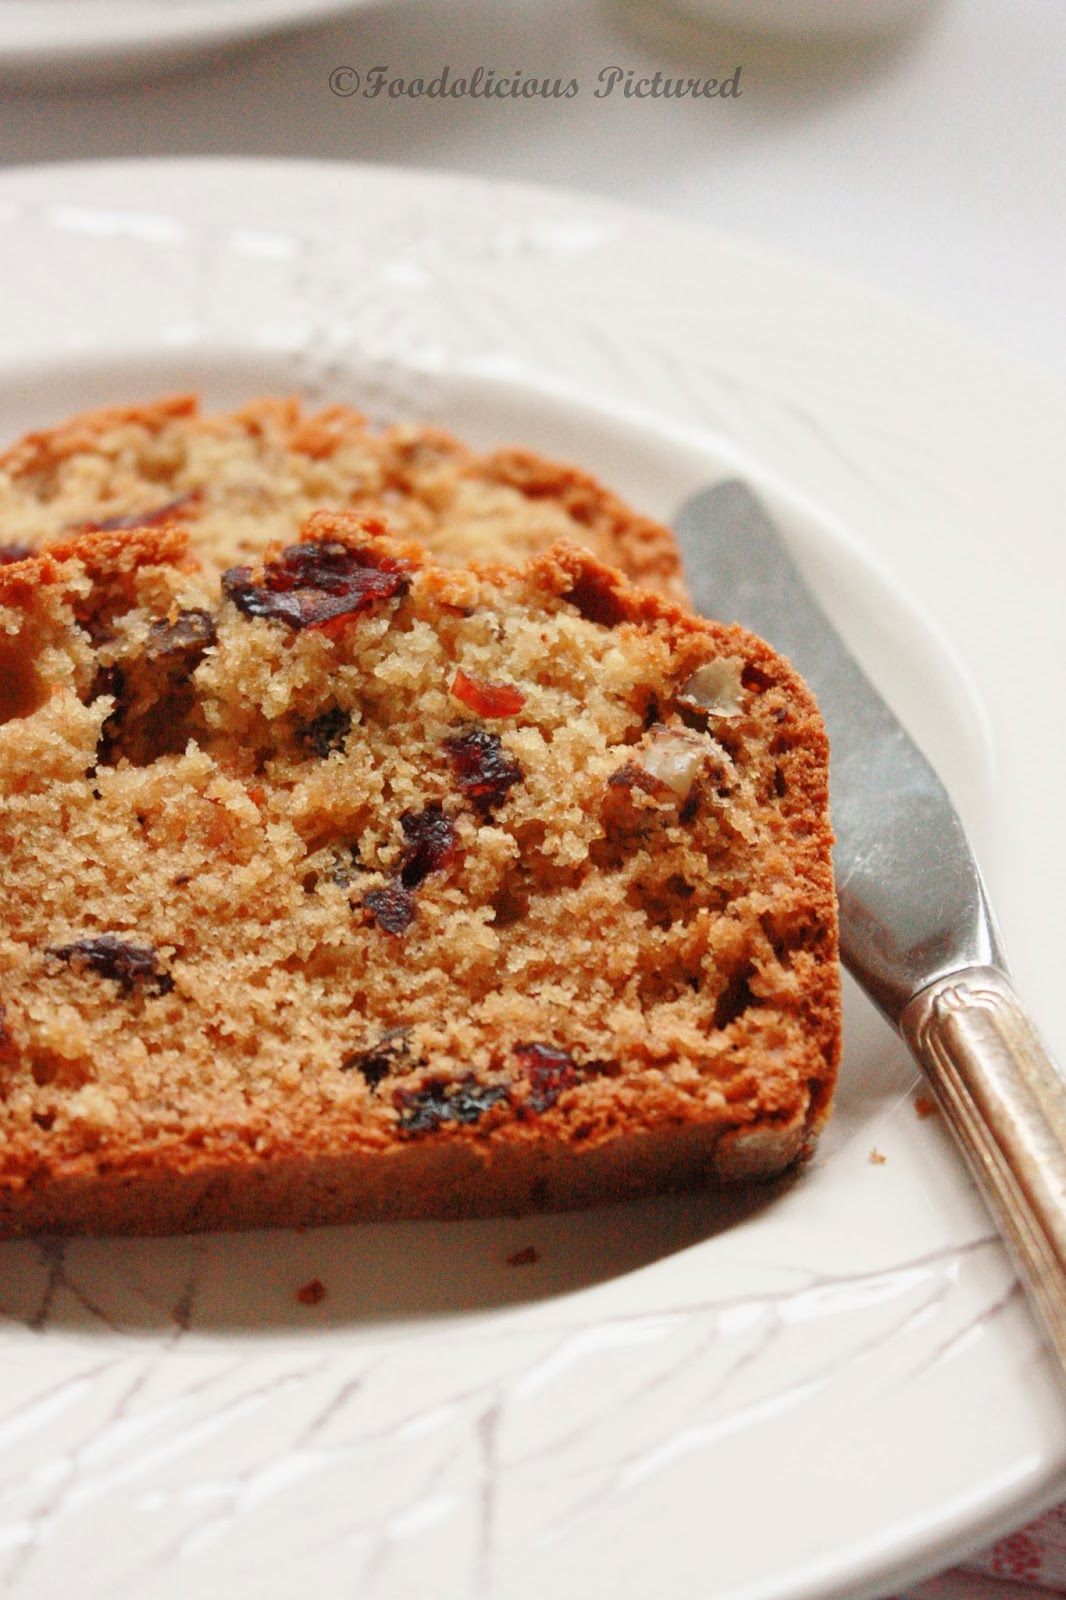
Cranberry, raisin and walnut loaf

Hope you had a wonderful Diwali with lots of fun and great food. Yes! We did too.
Ah! Now it’s time for thanksgiving and Christmas. My little one is so excited and has already made her Christmas shopping list. This Christmas I have promised her that we will do lots of baking together. The two of us are so looking forward to it.

I have started off with my baking for the season. And if it’s Christmas it must be cranberries. This soft loaf with the crunchy walnuts, tangy bits of cranberries, the sweetness of raisins is scrumptious and so ideal to get baking for the season.
Recipe source – Simply recipes
You need –
- All purpose flour -2 cups
- Caster sugar – 3/4 cup
- baking powder – 1.5 teaspoons
- baking soda – 1/2 teaspoon
- salt 1/2 teaspoon
- walnuts – 3/4 cup, coarsely chopped
- dried cranberries – 3/4 cup, roughly chopped
- Raisins – 1/4 cup
- orange juice – 3/4 cup
- butter – 1/4 cup, melted
- Egg – 1, beaten

How to –
Pre-heat the oven to 180 C. Grease a 9×5 loaf pan.
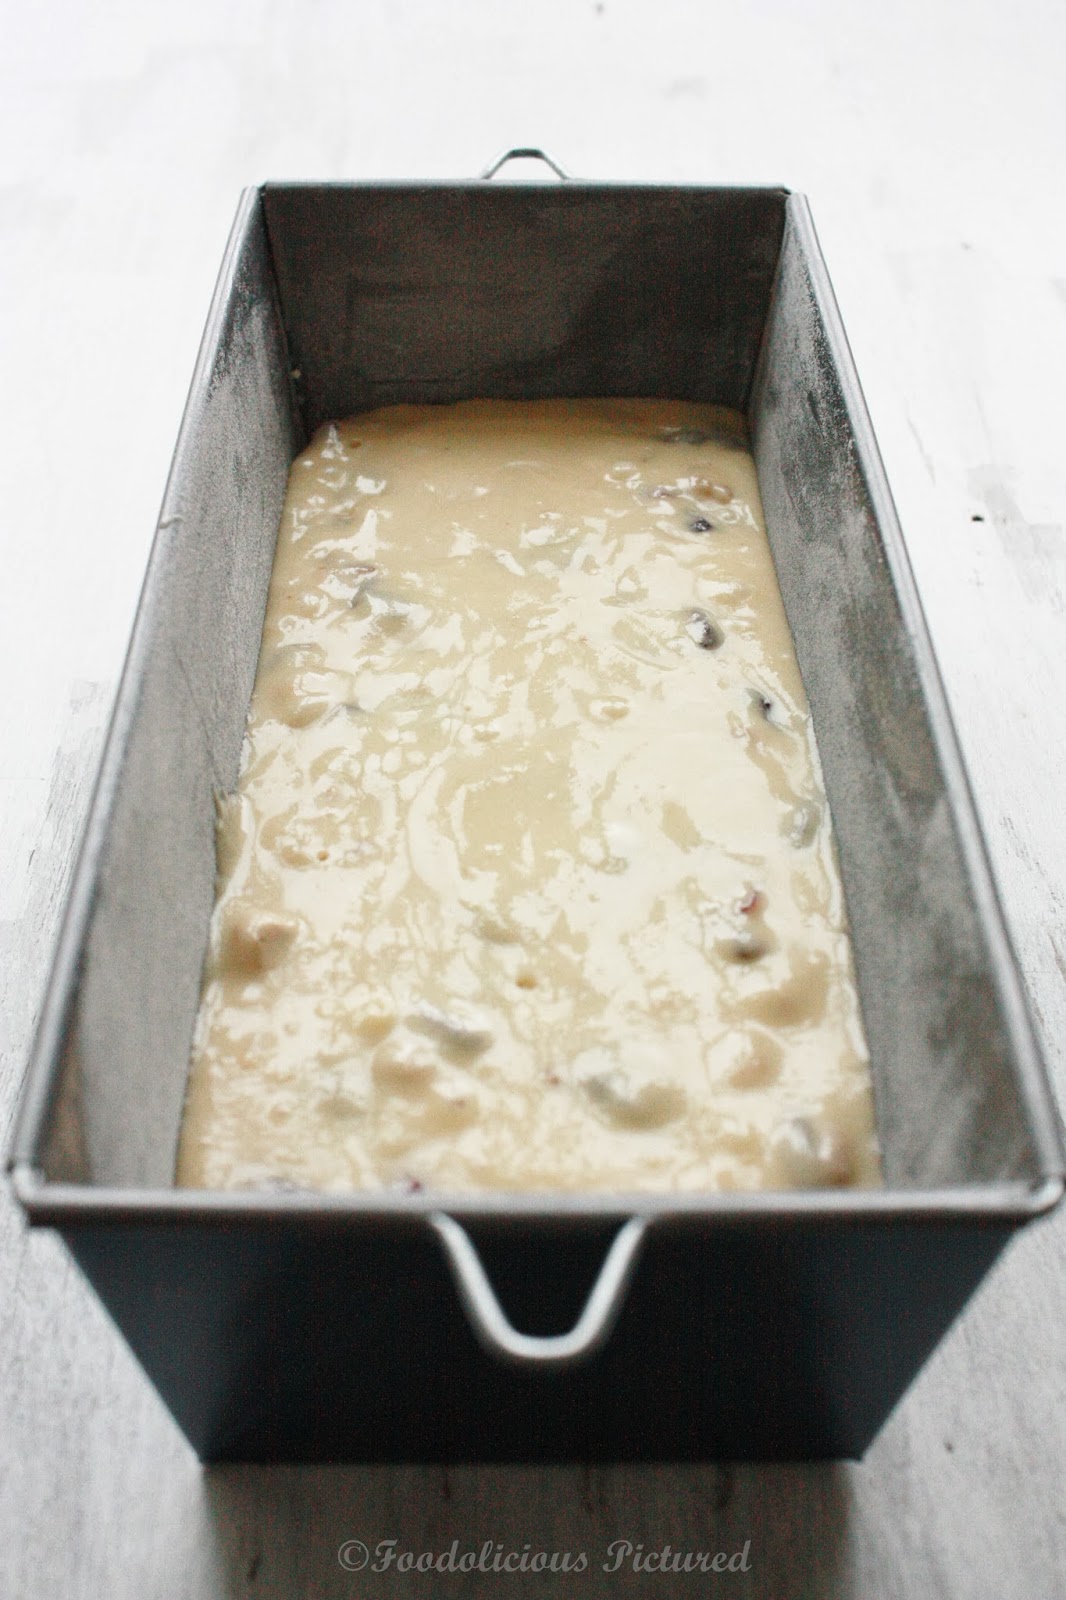
In a bowl sift together the flour, baking powder, baking soda and salt. Add the sugar and mix well. Add the walnuts, cranberries, raisins to flour mixture and mix well to coat. Set aside.

In a mixing bowl, Add the melted butter, egg and orange juice. Beat will till well combined. Now slowly add the flour-cranberry mixtures to the wet ingredients and stir with a wooden spoon till everything is just blend.

Spoon the batter into the greased loaf pan and bake for 50-60 minutes or till the toothpick comes out clean when inserted in the middle of the loaf.
Cool the loaf for 10 minutes in pan and then on a wire rack.

Storing – Wrap tightly and store in refrigerator once cooled completely.

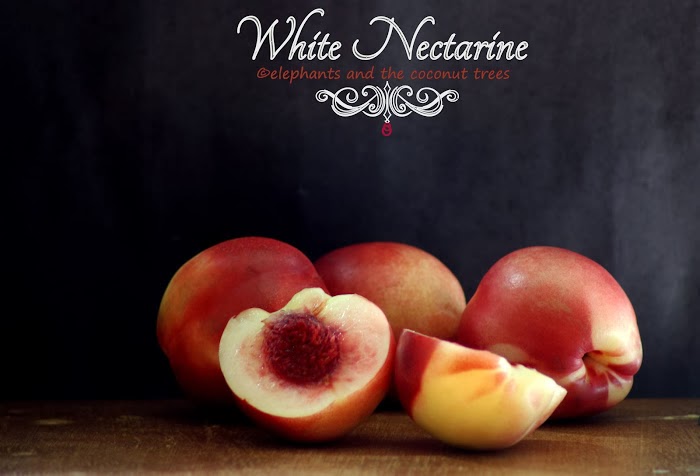
Nectarine & Apple Jam – A guest post

I have been quiet about inviting my blogger friends and co-bloggers for guest posting. Now, after a long gap I have a guest over to share a lovely recipe with us.
She was the first one who dropped a comment on my blog and my first blogger friend. Though I met her here in the blog world, it feels like we have known each other for ages. A friend I dot on for every little thing be it about blogging, photography or where to download new fronts from. She has been always there to help.
It’s my pleasure to introduce you to Meena from elephants and the coconut trees, a blog featuring some mouth watering recipes with very crispy & creative photography. I truly admire her style and the way she plates her dishes. Her food stories that are woven around her childhood/growing up years sure takes you through the memory lanes.
All her recipes get me drooling, yet here’s a few of my favorites from her blog that came quickly to my mind. Do Visit her blog for great recipes.
- Coconut chutney powder
- Milk fudge
- Fish pickle
- Raspberry and Chia seed pudding
- Nadan konju theeyal
- Spicy chicken varuval (oh! this is really delicious and I make it quite often)
- Mango icecream
Meena, I can’t thank you enough for doing the guest post and so excited about sharing this wonderful recipe and so so beautiful pictures with my dear readers.
Now, over to Meena…
Hello lovely people,
This is Meena, the hand behind the blog elephants and the coconut trees . I am from Kerala, India currently living in California with my techie husband and tween. I am a big time foodie and enjoy most cuisines barring a few meats.
My cooking is the reminiscent of the comfort food I grew up eating and some that are newly acquired .The blog becomes my food memoir in the making where like minded people come , we laugh and we literally converse which I think is the best part of having a blog. Never thought I would make so many friends virtually.
Love spending time photographing food , a learning process and a challenge I happily take up. I click until I am pleased .Sometimes a post can wait for months to get the right set of pictures .I am self taught and not an expert in food photography but I judge my work I should say very harshly.If it is not appealing to me then the blog does not see it. I think that pushes me a lot. I am very passionate about the blog and love to write what is in my heart and not go by dates,deadlines or keep up with Joneses:).Perhaps that is the reason so many of us are having a blog, nothing dictates right!
Coming to the recipe, I have never made jam till this year nor did it ever strike me to make at home until my daughter repeated asked for a bottled one every time we were in store I was reluctant as I knew jam would be the main meal and bread would be name sake :)).. So just decided to make some without preservatives,dyes or additives. This is my third attempt of jam making u see here :). I totally understand why women in the West brag about the homemade jams and preserves I mean it tastes awesome when compared to store bought ones.
My ancestral home in India has big backyards and large farm lands so every year summer vacation was spent eating jack fruits, mangoes and tamarind. Can you imagine the state of the stomach !:))) Tamarind pods would leave the mouth so sore that finally even water burns :)). It was beyond our capacity to finish all this in raw state so only those went for preserves and pickles.We were also sent a large chunk of those in every form possible :))
At home mango,guava,banana, rose apple, mulberry etc were eaten only fresh.There was no excess… come on! what are friends for, to share the produce right !! More over my folks never approved of bread and jam as a satisfying breakfast. Bakery bread used to be served only with stews.Indians by large go for a savory breakfast, their preference of fiery spice could be the reason behind the wide variety of pickles available there than jams.

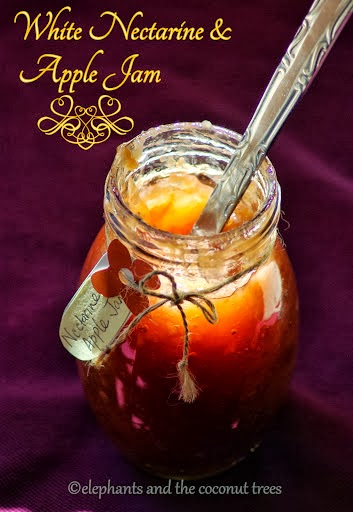
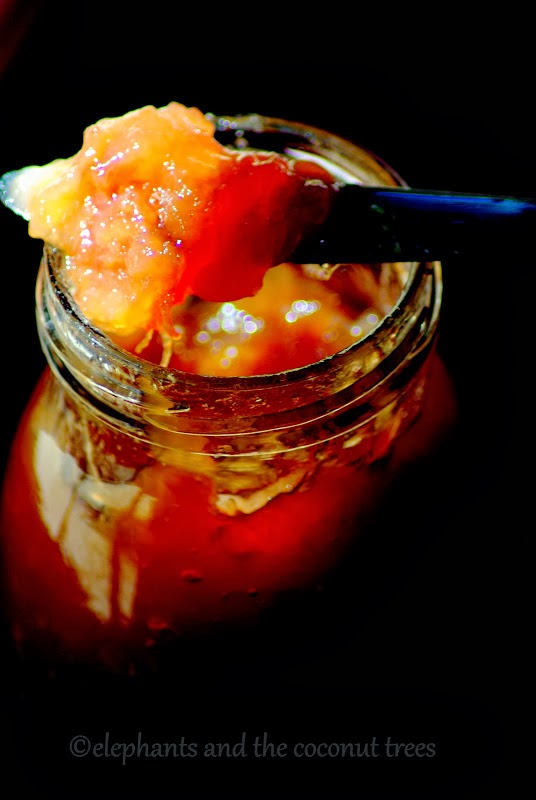
How about some bread, butter and homemade jam!! Ya !there is a glass of milk in the background but you will need a torch to see that lol..

Apple is used here to get the jelly like end product as it contains high amounts of pectin..Use just ripe fruits for best results.
Ingredients:
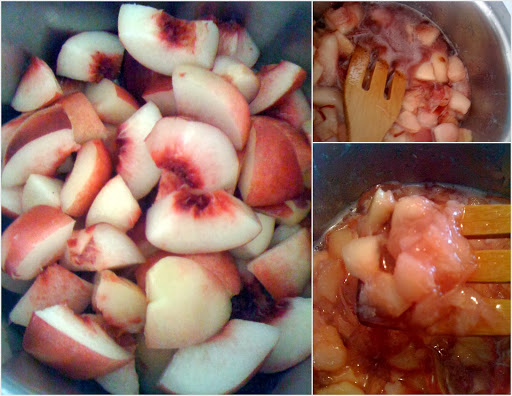
White nectarine-5
Apple -1(any kind)
Sugar- 3/4 – 1 cup
Lime juice- 1/2 of 1
Method
- Wash and wipe the fruits . Discard seed need not remove the peel as it becomes soft and not visible in the jam.Slice nectarines into bigger pieces and chop the apples as nectarines cook faster than apple.
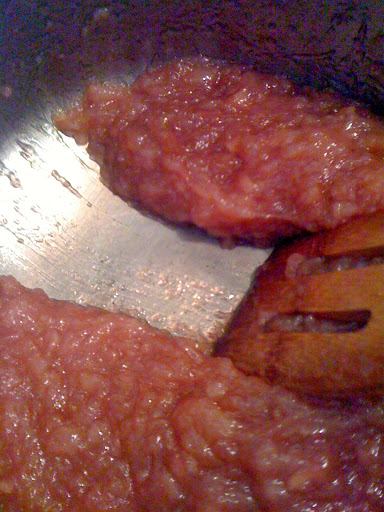
- In a heavy bottom pan combine all the ingredients and cook on a low to medium flame till the juices from the fruits come out then reduce flame and allow it to thicken by stirring often.If u stir for too long then the jam will lose its thickness and become watery. See all the water!all that came from the fruit!So don’t be tempted to add even a drop of water.
3. Do not mash the fruit too much as the elasticity of pectin is lost and tends to become watery.
4. A good rule of thumb is when you separate the jam with the spatula it should part in the middle and form a path (see bottom pic)then the jam is ready.
5. Pour the jam into a clean dry jar while it is still hot and let it cool then put the lid and enjoy for breakfast or like my daughter does scoop whenever she wants some 🙂
Note:
- Any fruit that you like could be used to make jam.
- As the jam cools down it will thicken a bit more.
- It tastes best when made in small quantities.
- Since no sealing and canning is done store the jam in the fridge after 2 days for up to 3 weeks.
- Make the jam on slow flame only .Don’t hurry up:)

Thank you Meena for a wonderful recipe and I can’t wait to make this 🙂 Here’s wishing you all the very best and stay blessed always.
Dear friends/readers, hope you liked the post and recipe what Meena has shared. We are looking forward to hearing from you and thank you for your time.
See you soon with a new recipe.Till then…
Take care
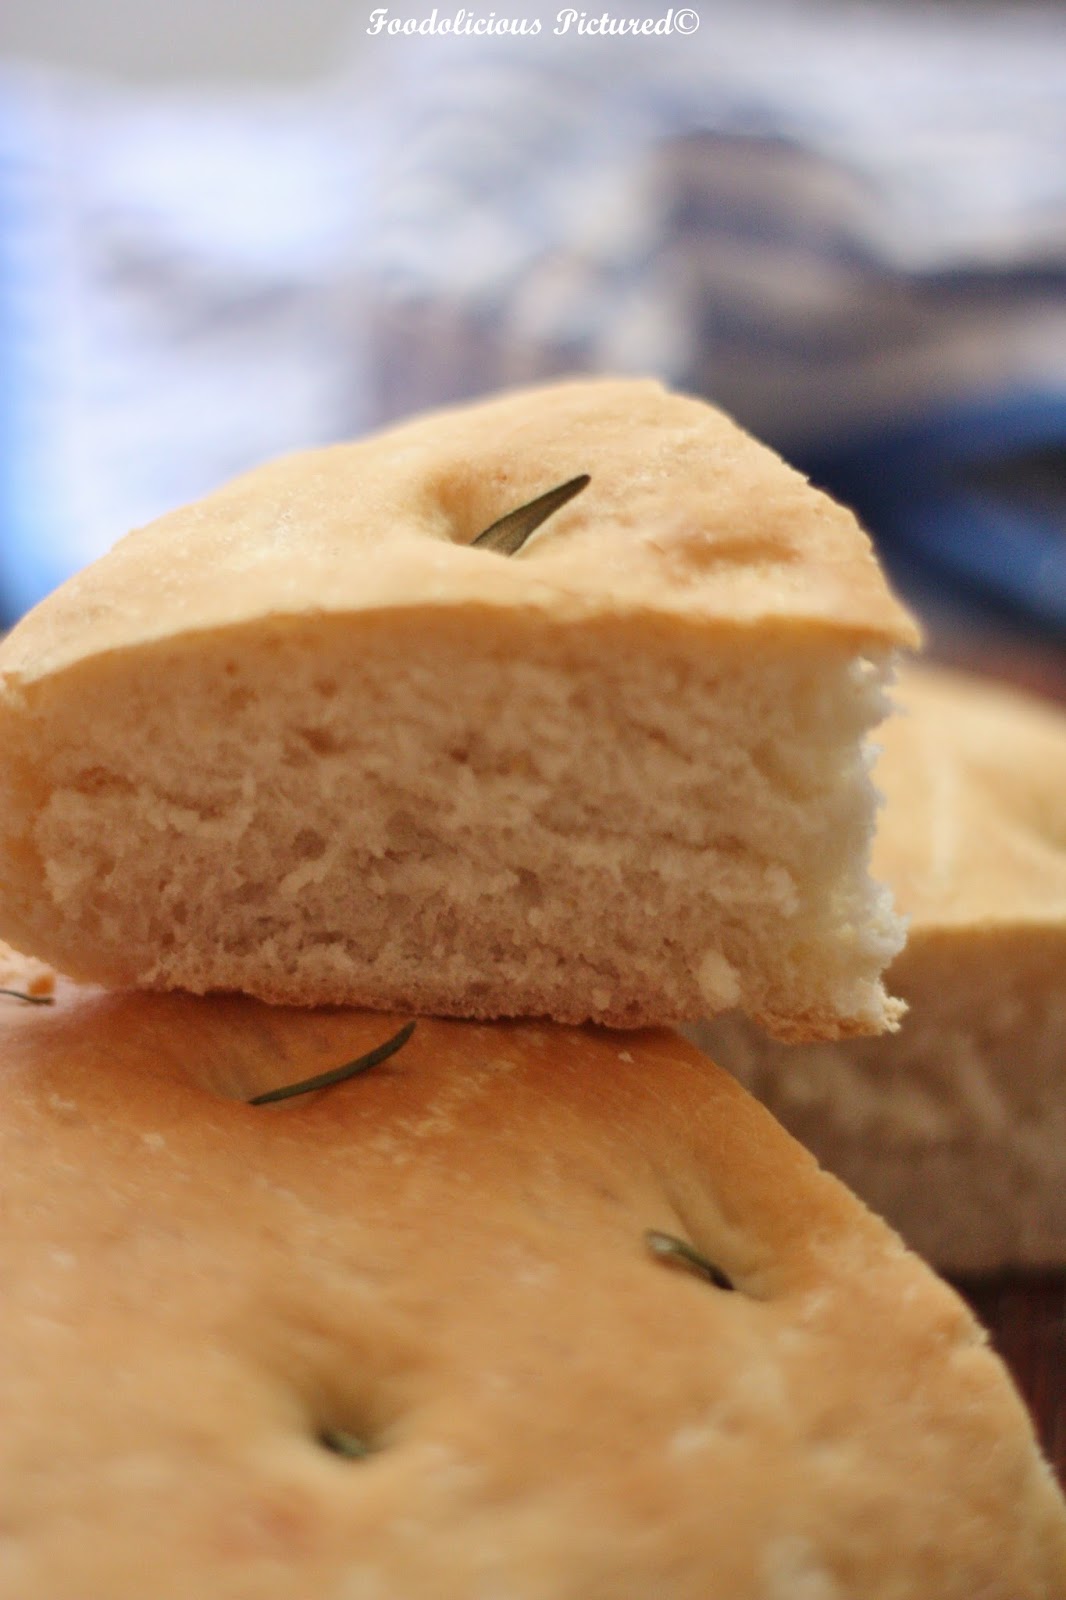
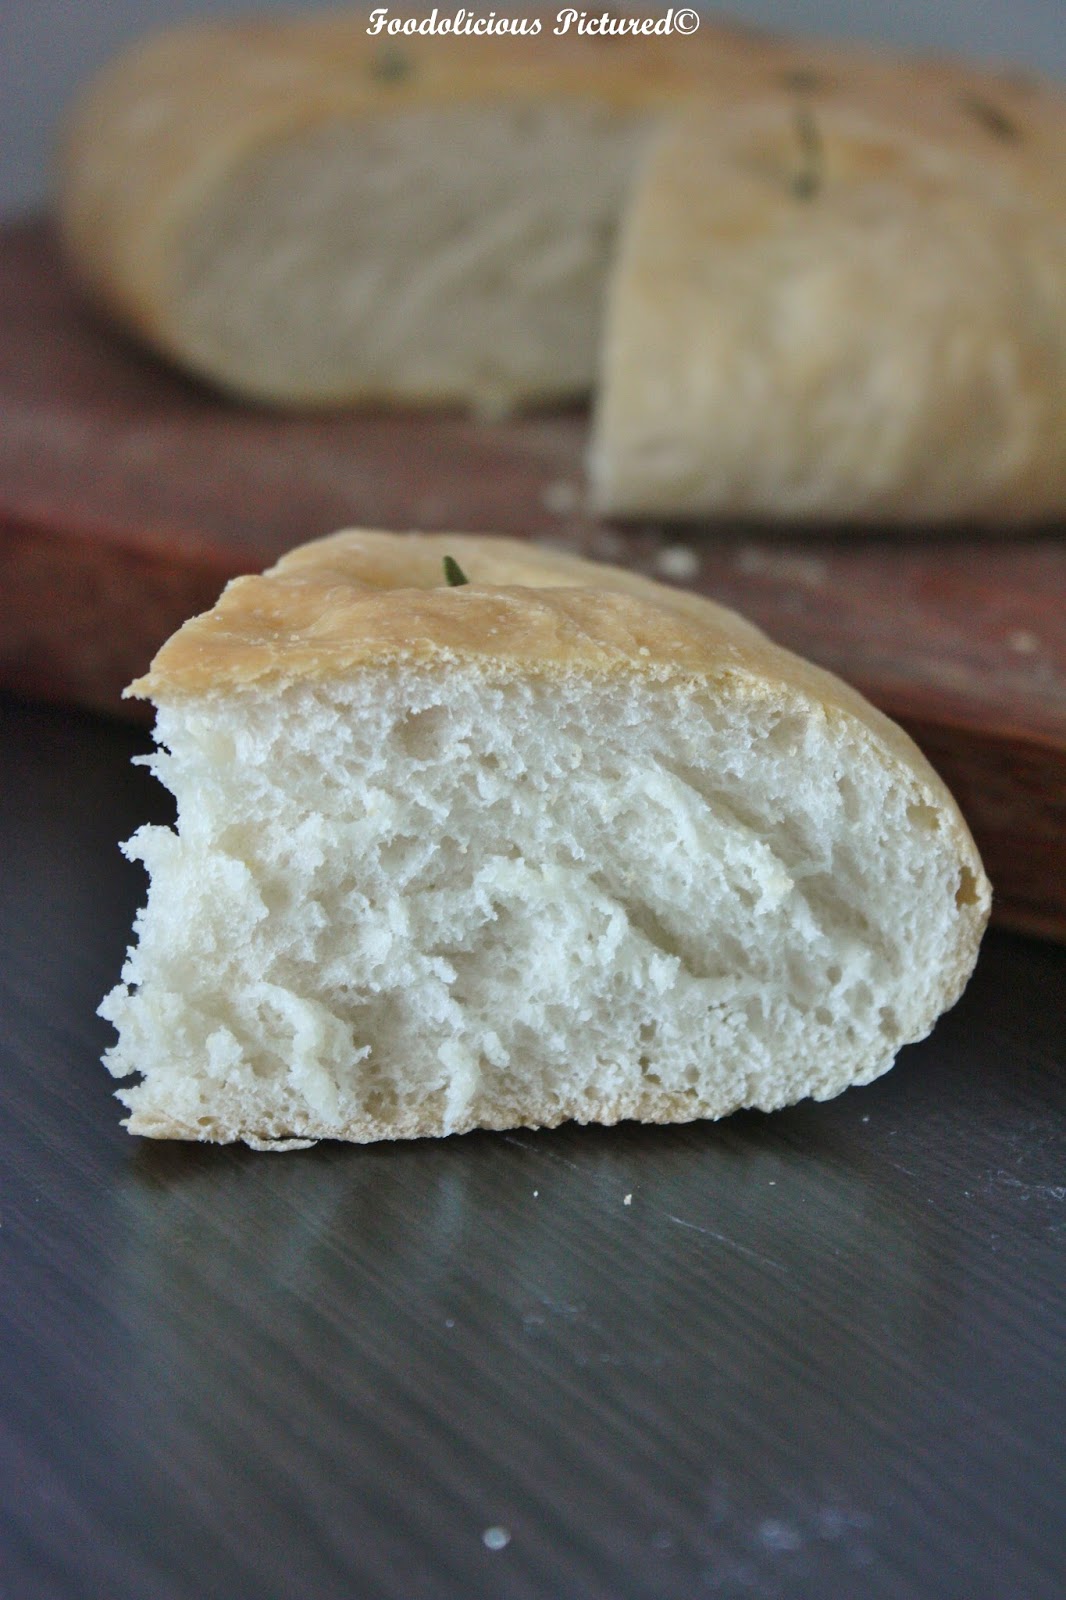
Rosemary Focaccia
Focaccia is my favorite bread. With that generous dip into the olive oil is sure an indulgence for me. Every time we are at an Italian restaurant this is something I look forward to start off with and lucky some of the restaurant that we are regular at kind of know this is my weakness and they never fail to give a few slices more 🙂
This is one of the easiest bread I have made, yes of course make sure your yeast is active else it can be a complete disaster and be prepared to knead the dough for almost 10 minutes. Ah! I have toned hands!

You need –
- White bread flour – 500 grams
- Salt – 1 1/2 teaspoons
- Instant yeast – 2 1/2 teaspoons
- Olive oil – 2 tablespoons plus extra for drizzling
- Lukewarm water – 300 mls
- Rosemary – 2 tablespoons
- Fine sea salt
How to –
In a large bowl, put the flour, yeast and salt. Mix well. Now stir in the oil, water and knead to form a soft dough.
Turn the dough to a slightly oiled surface and knead for 8-10 minutes. Put the dough back into the same bowl (lightly oiled), cover with a tea towel and let it sit to rise double in size in a warm place. Approximately about an hour.


Pre-heat the oven to 200 C. Line two large baking sheets with grease proof paper. Turn the dough to a flour surface and cut into half. Flatten each portion on the baking sheet. cover and leave to rise again for an hour.


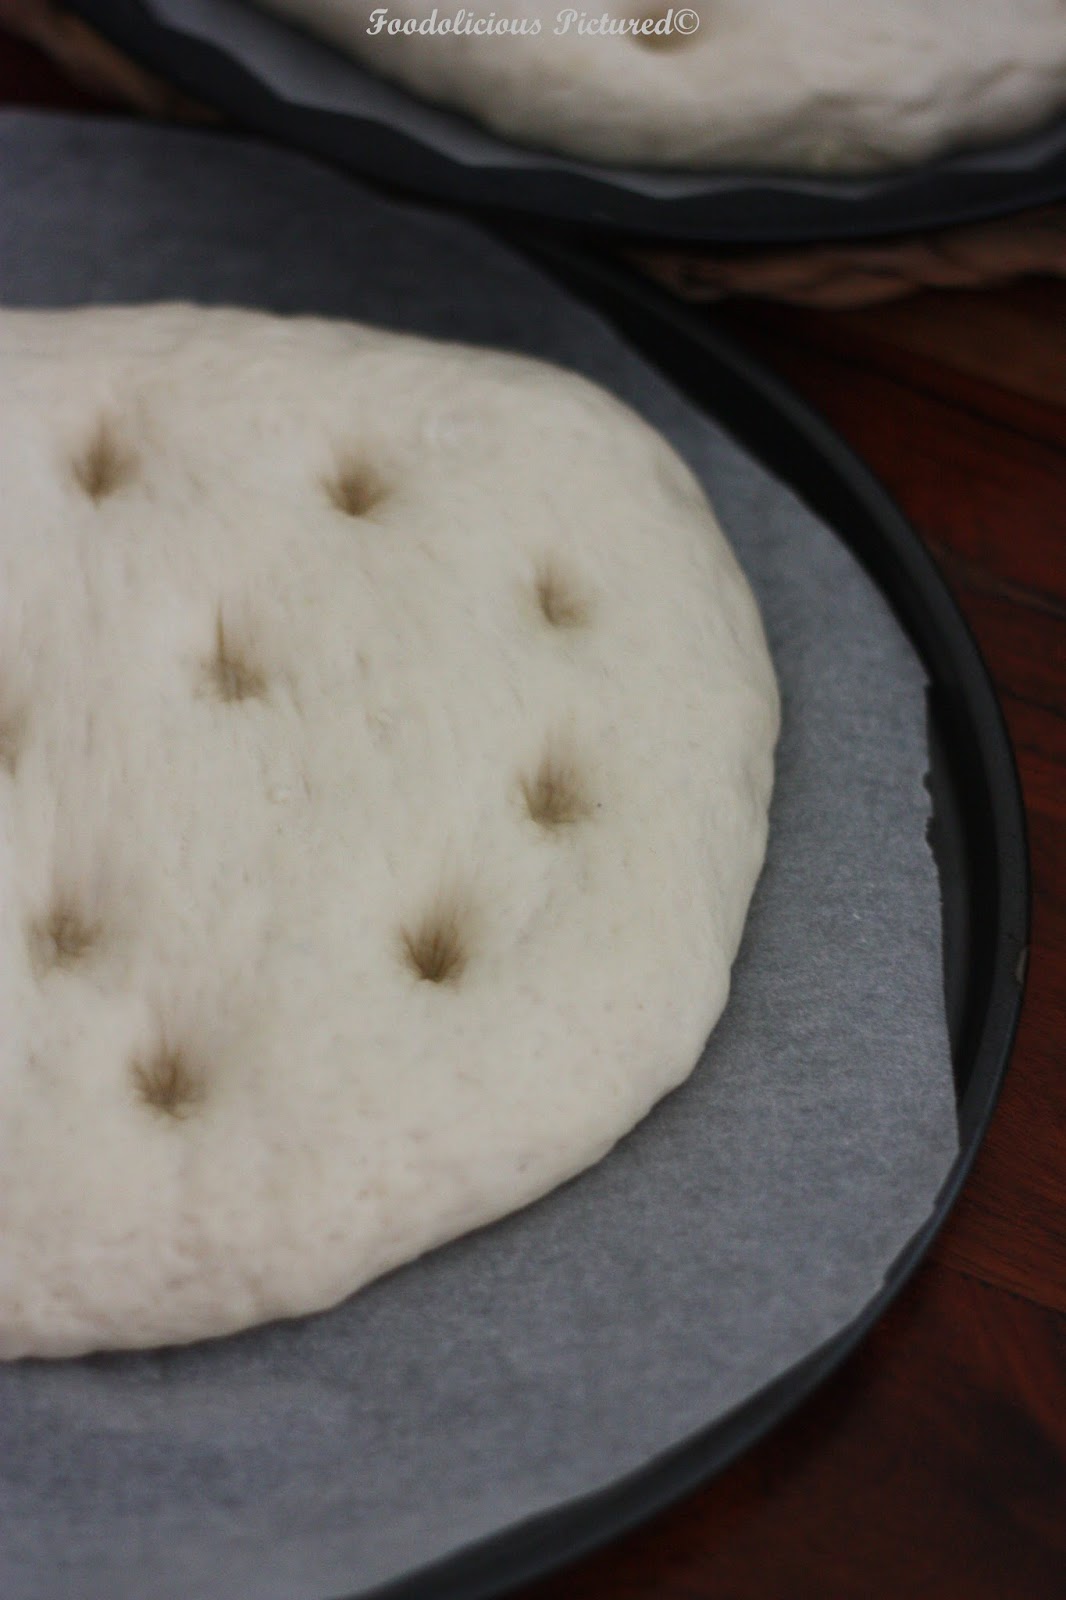

Gently press your finger into the dough to make deep holes all over and leave for a further 5-10 minutes. Sprinkle each loaves with rosemary and sea salt. Drizzle some olive oil and bake for 25 minutes or till pale golden. Remove from the oven and drizzle some more olive oil.

Serve hot or warm.
Note –
- If you are not sure if your yeast is still active, them prefer you do a proof test. Take half of the lukewarm water ( please make sure the water is not hot. Otherwise your yeast will die). Stir in the yeast along with a pinch of sugar and set aside for 10 minutes. If the form and bubbles foam on top in 10 minutes then your yeast is still active. Add this to the dough with remaining water as per the recipe.
- The above recipe makes 2 loaves. If you do not want to use both loaves then freeze the other for later. Warm in the microwave before serving.
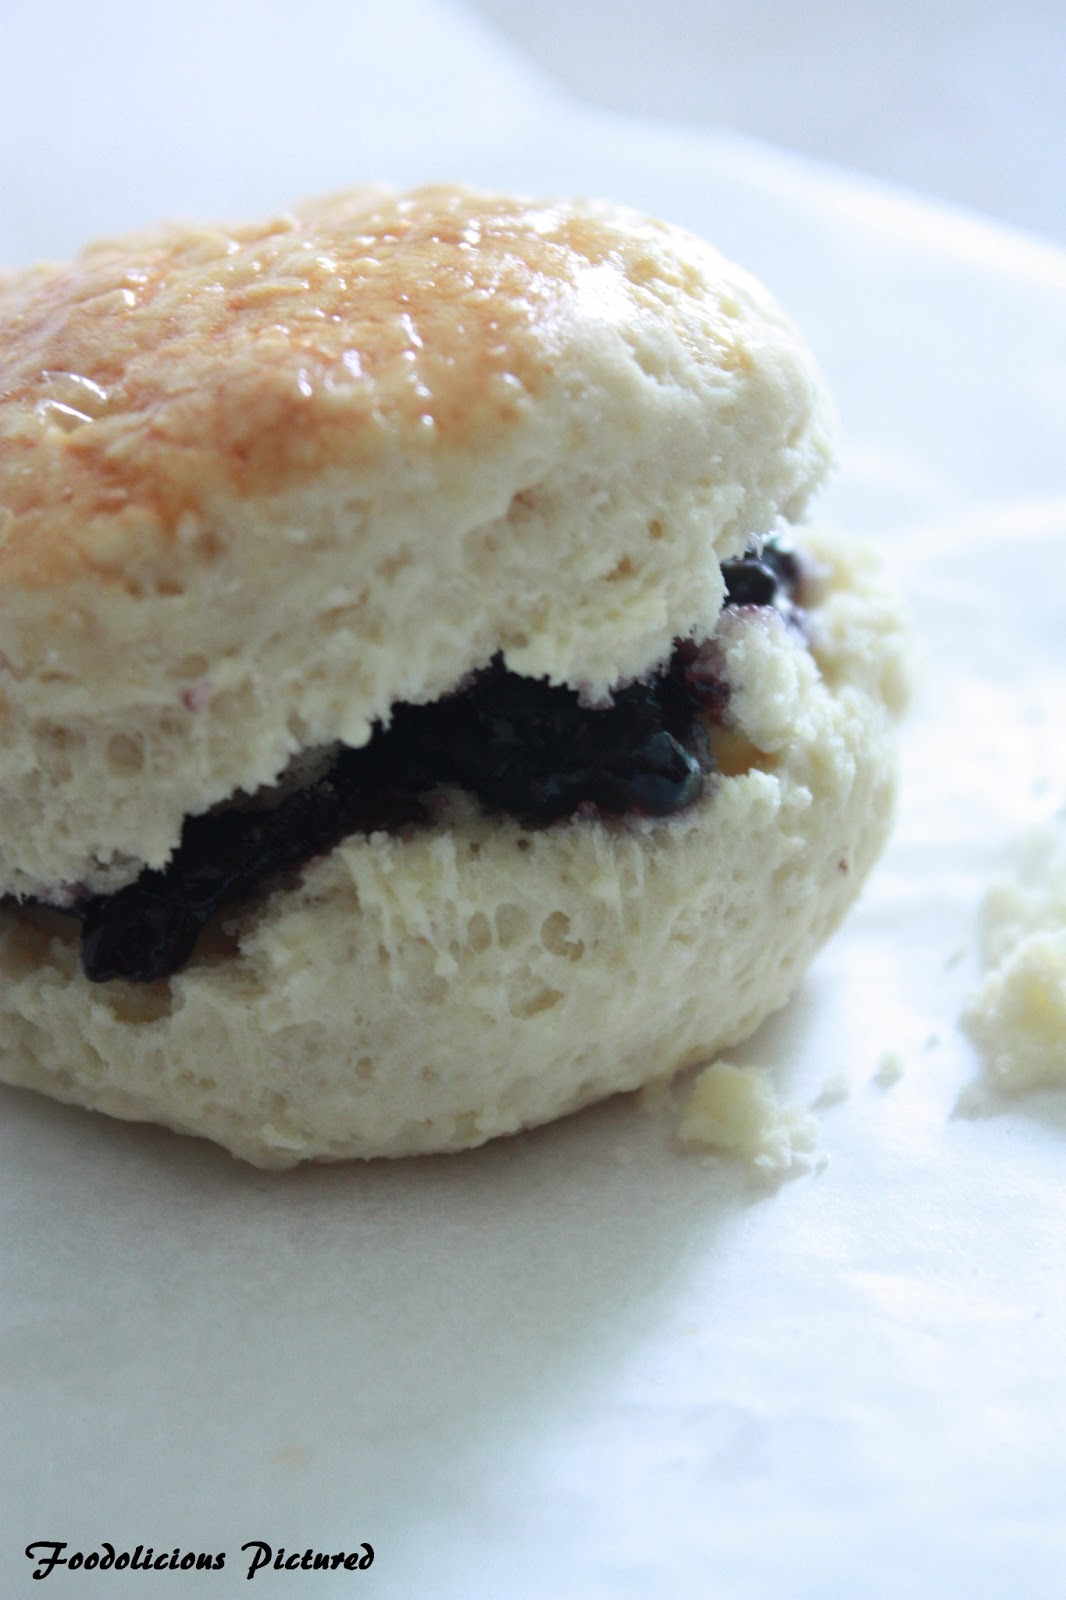
Scones
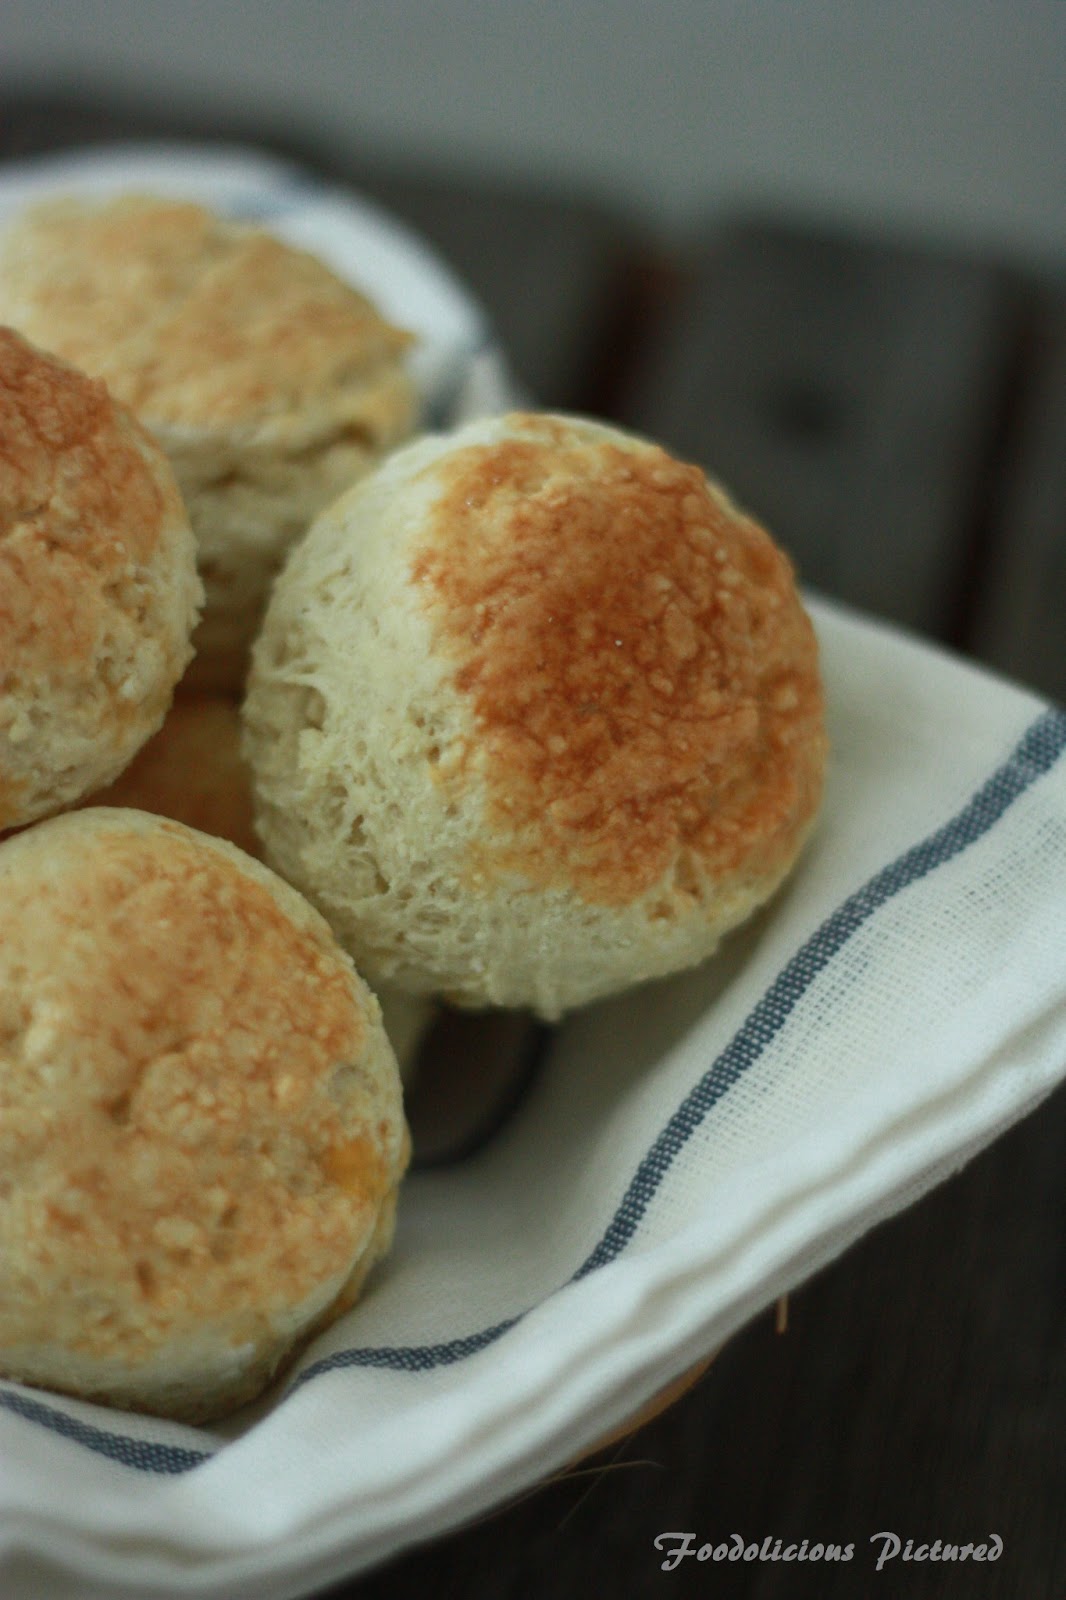
The first time I made scones it turned out to be sore. Not sure what went wrong but it was so terrible that If I hit someone and they could bleed. Hmm some days are not just yours . Nevertheless, I gave it another try over the weekend. I first made some mini scones and then went on to make a whole batch after the mini scones tasted perfect.
 |
| Mini scones |
The recipe is adapted from BBC good food.


You need-
- Self-raising flour , 350 grams + plus extra for dusting
- Salt – 1/4 teaspoon
- Baking powder – 1/2 teaspoon
- Butter – 85 grams, cubes
- caster sugar – 3 tablespoons
- Warm milk – 175 mls
- Vanilla extract – 1 teaspoon
- Beaten egg , to glaze

How to –
Pre-heat the oven to 200 C.
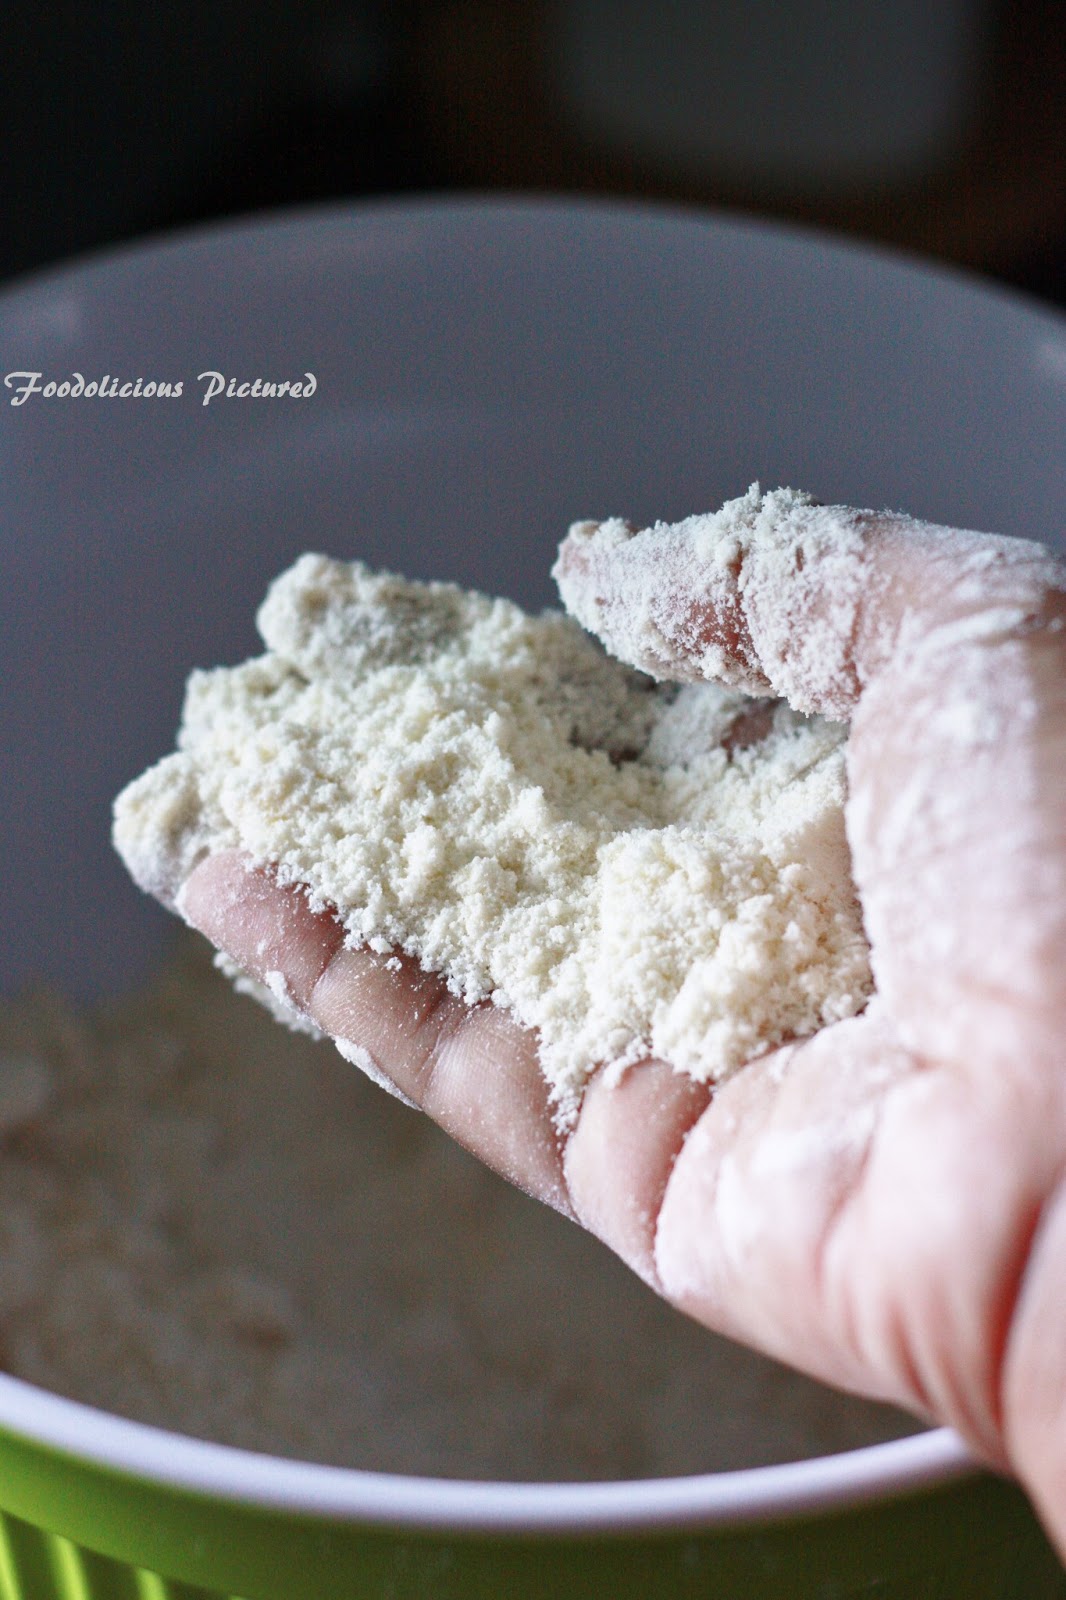
In a mixing bowl, mix together flour, Sugar, salt and baking powder. Add the butter and rub with your figures until the mixture looks like fine crumbs. Add the vanilla essence to the milk and stir. Make a well in the middle and add the milk. Slowly mix the flour to form a soft dough.
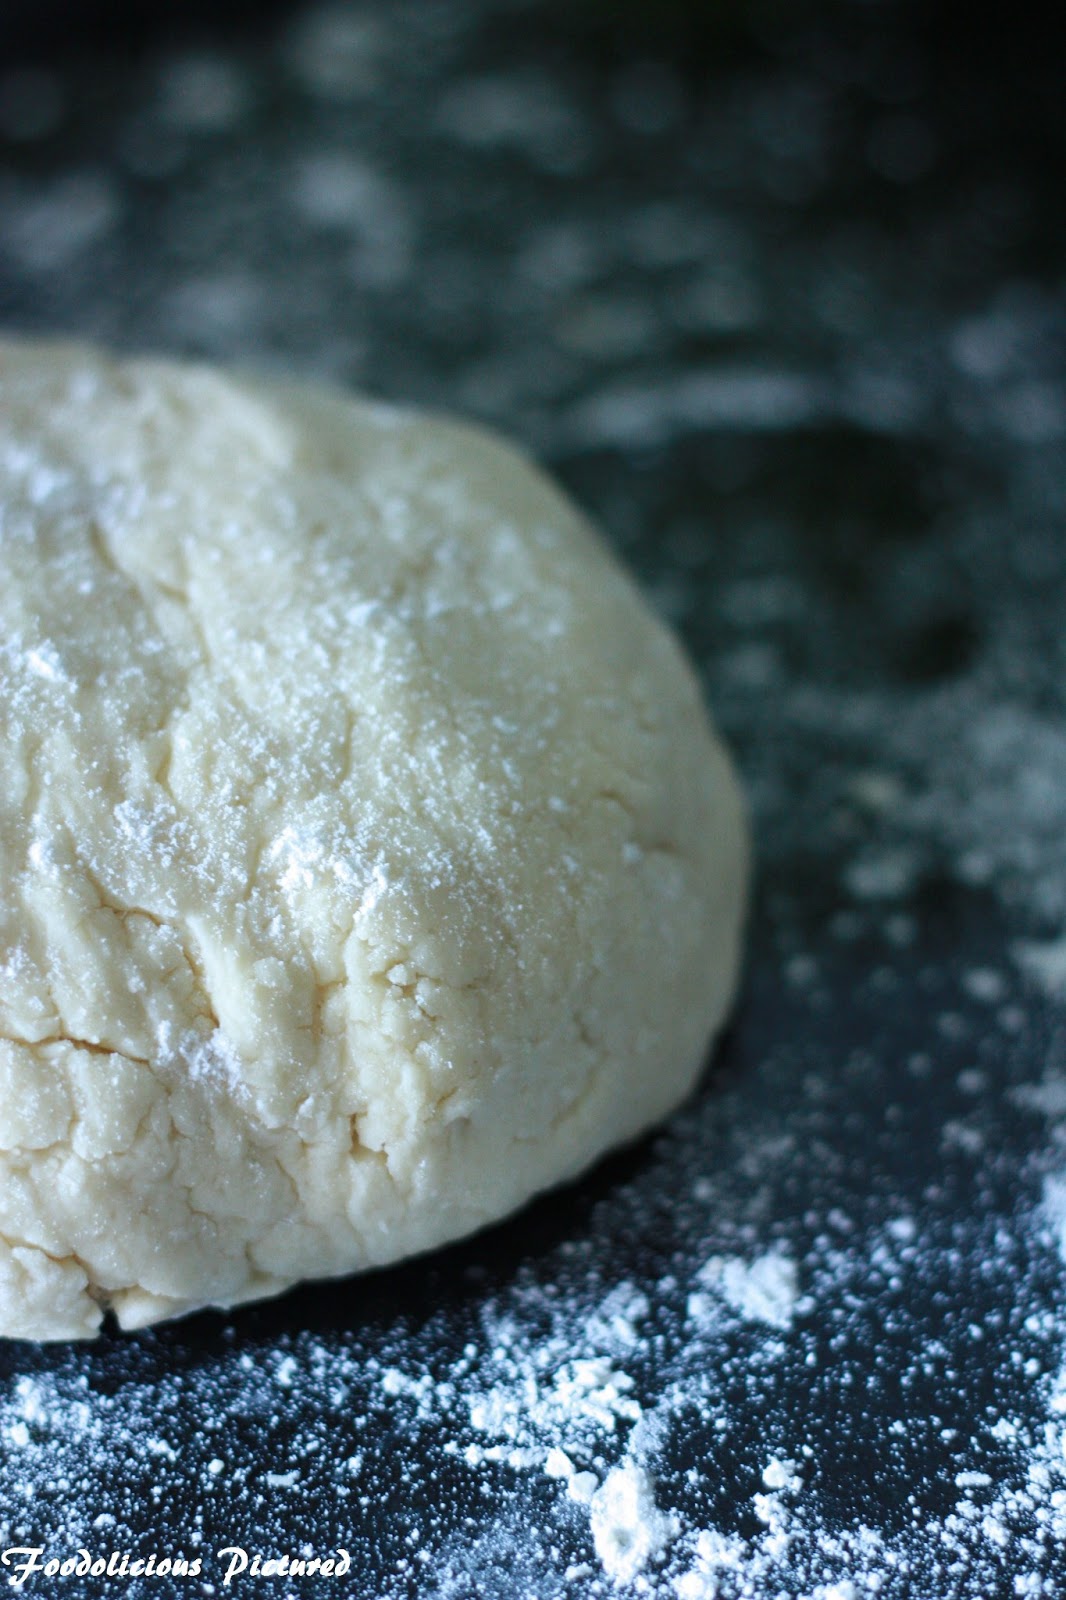

Sprinkle the work surface with some flour; place the dough and gently shape into a ball and smooth. Brush the excess flour and roll the dough till its 2 cms thick. Cut the dough using a 5 cms cookie cutter. To ensure the dough does not stick to the cutter, dip the cutter into the flour before plunging into the dough.


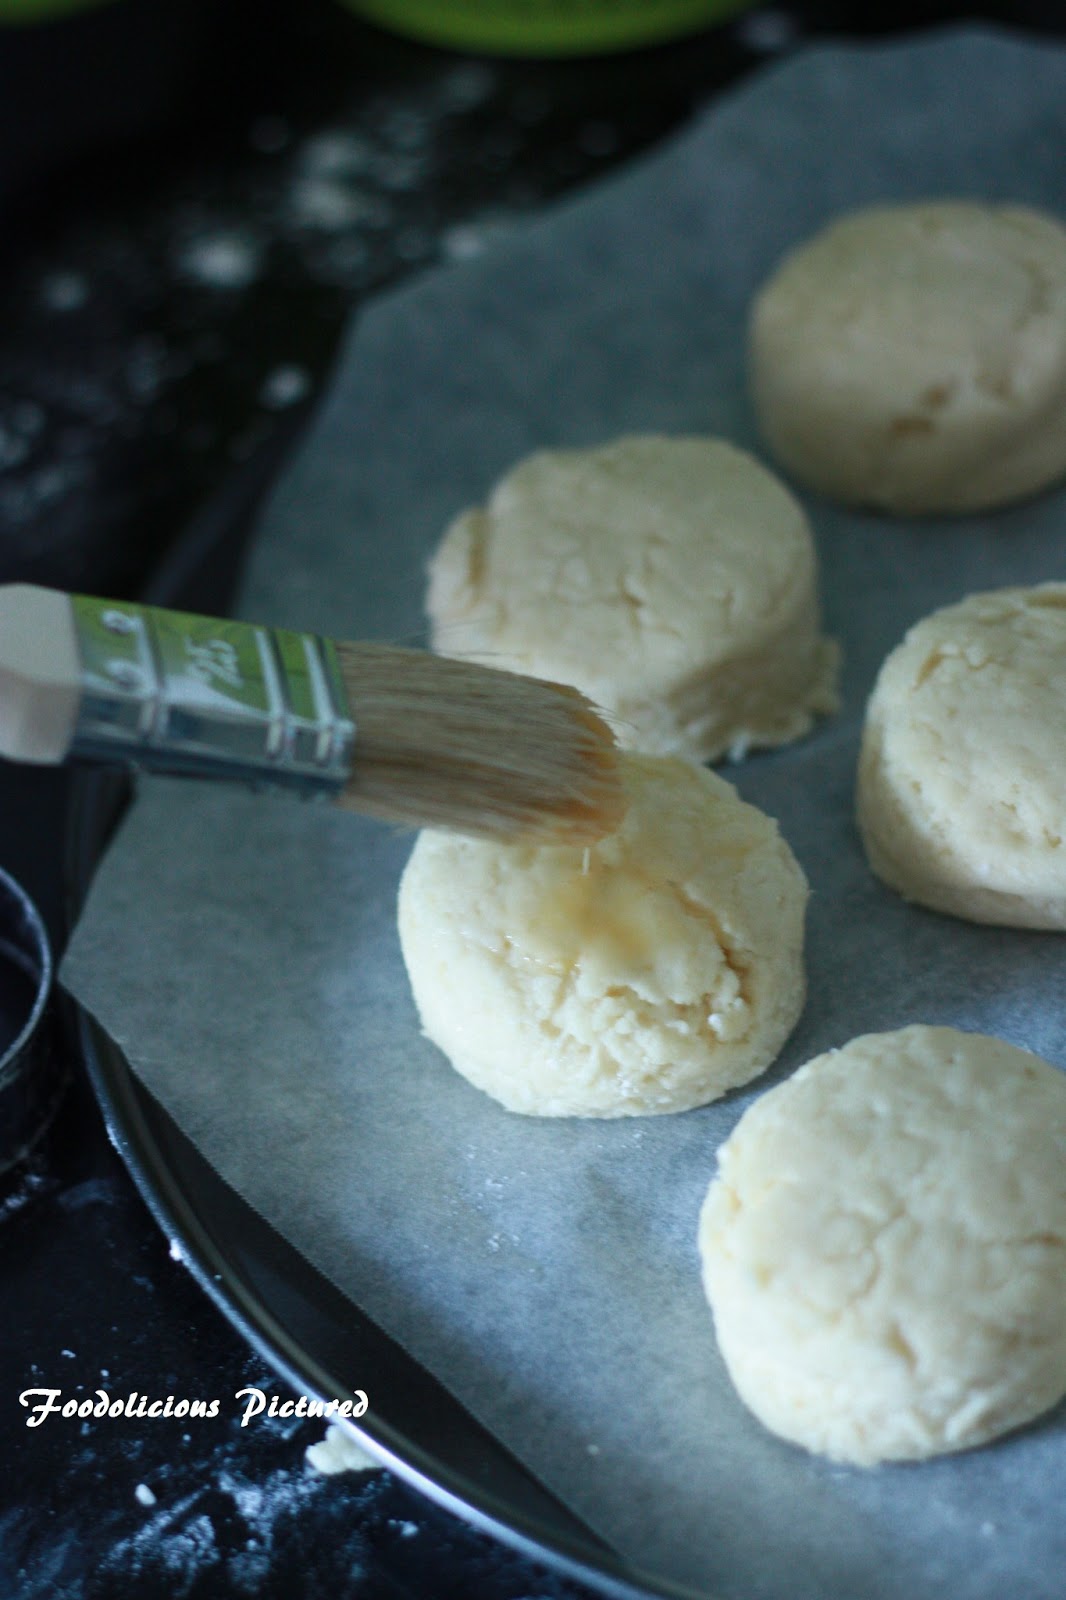
Place the scones on the baking tray. Brush the top with beaten egg and bake for 12 minutes or till golden on top.
Remove from the oven and let it stand for 10 minutes. Serve warm with butter, Jam or sour cream.