No-bake strawberry cheese cake–in a cup/glass/jar

After all that drooling seeing 2 posts by my dear blogger friends, Rafee and Nava. I couldn’t stop but make it. My hubby calls me bottomless pit when it comes to cheese cakes. That’s been my love for a cheese cake. 

I first got a taste of this in 2007 when I had invited our dear friends over for dinner and they wanted to bring the dessert. Since then I am indebted to them for introducing me to the no-bake cheese cake. During my pregnancy and until Saana turned one, the only thing I ate was this and I guess it showed on my baby too.  Look at her at 6 months and you know where all that cheese cake went..:-)

My little sumo 🙂
Now for the last 2 years I have stopped making it often. I think the last I made one was 7-8 months back. Yet whenever I feel like eating one I do drop by star bucks, I love their New York cheese cake.

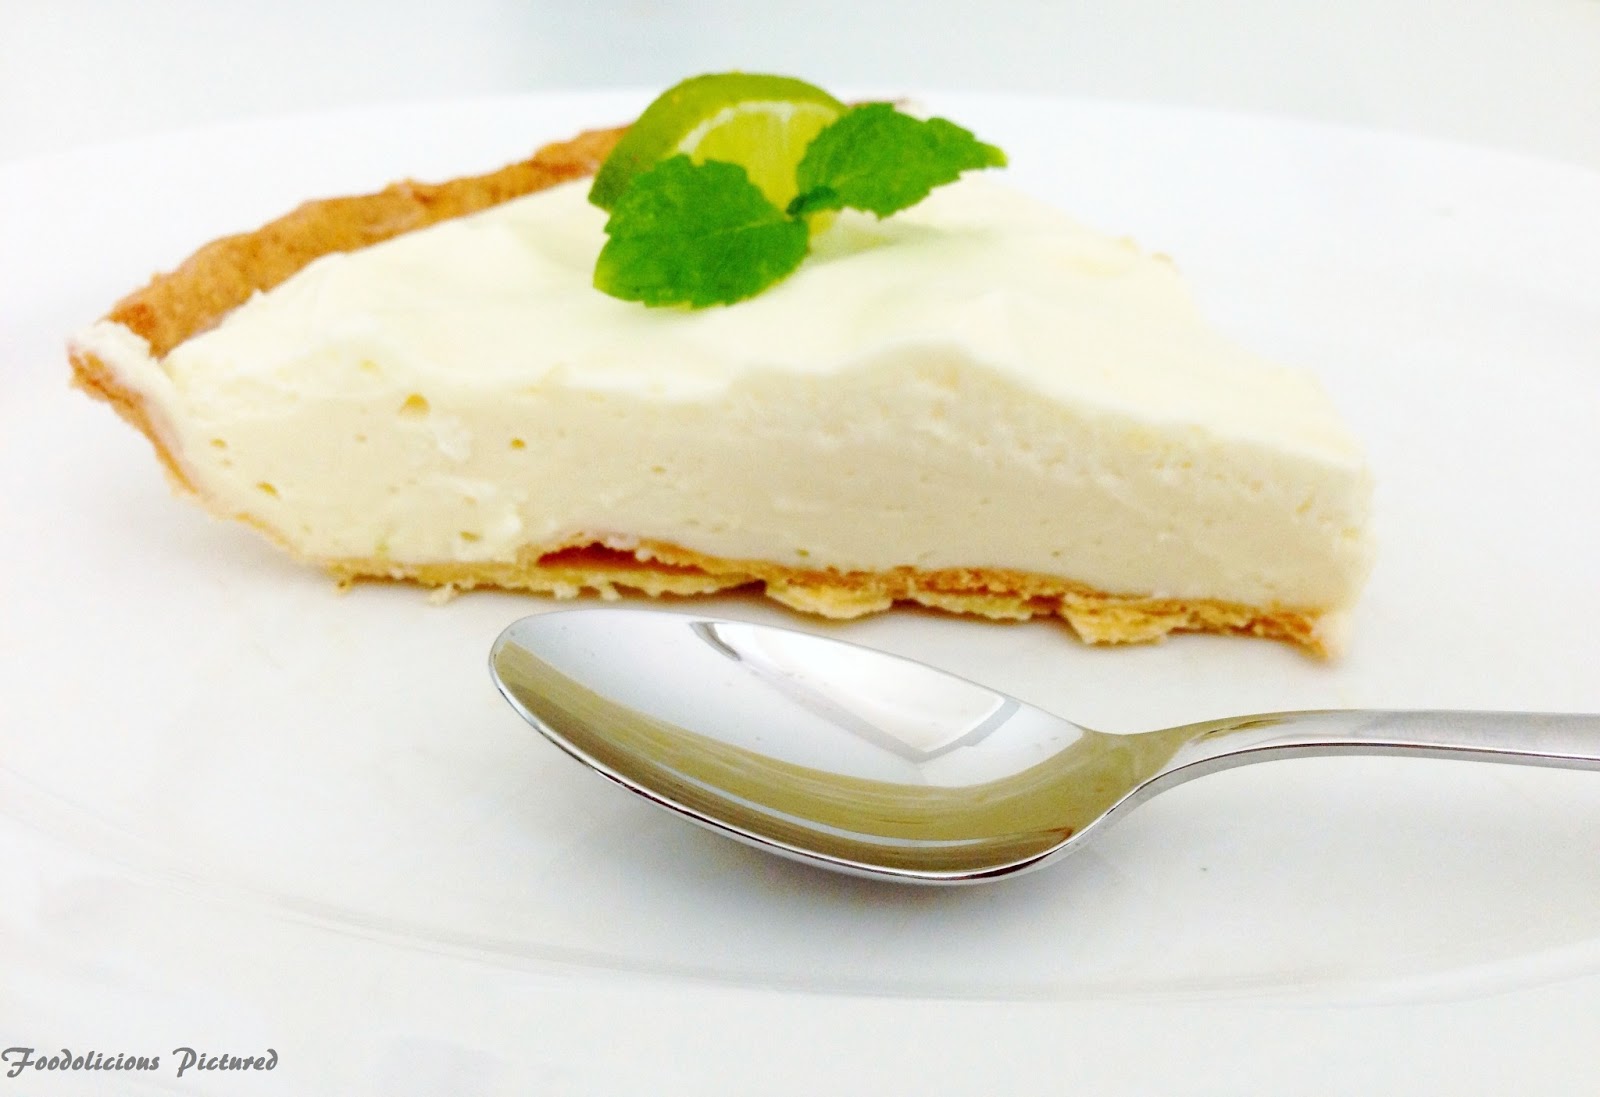
Over to the recipe, I have been making the no-gelatin version all the while and this is the first time I was adding in gelatin. I had read Nillega’s answer to a query where she says when you use gelatin it gives more a mousse like texture. I felt that was true. With gelatin or no, I love it. Cheese cake is the word!

You need –

For crust

  • Digestive biscuits – 250 grams
  • Butter – 75 grams (melted)
Filling

  • Cream cheese – 225 grams
  • Strawberry pulp- 1/2 cup
  • Thick cream – 1 cup
  • Sugar – 1/2 cup
  • Gelatin – 1 teaspoon
  • Fresh strawberries – for garnishing
How to –

Crumb the biscuits in a processors.

Mix the crumbs, butter well and spoon into the bottom of a jar/container and make sure to press down so it’s packed well and refrigerate for 30 mins.


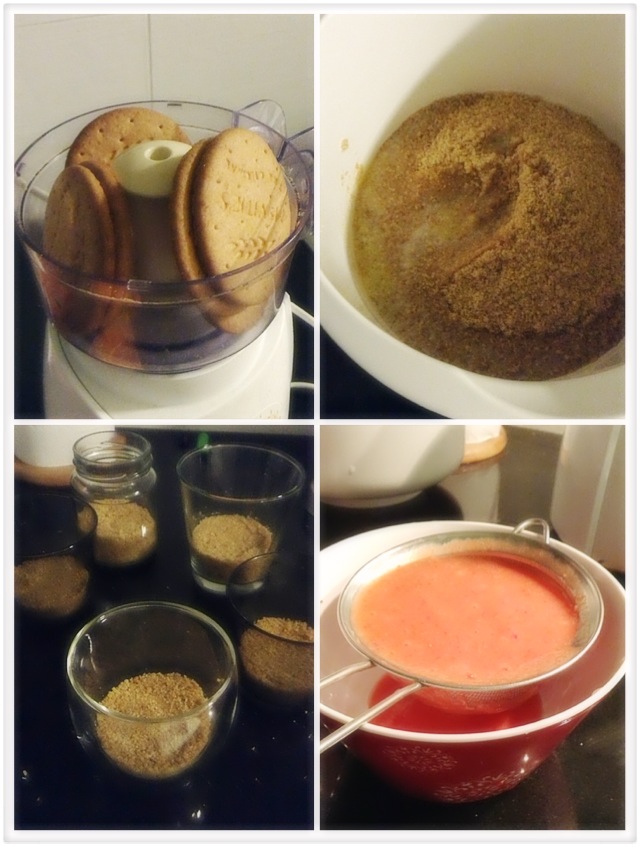
Sprinkle the gelatin in 3 tablespoons of hot water. Mix well and set aside to cool.

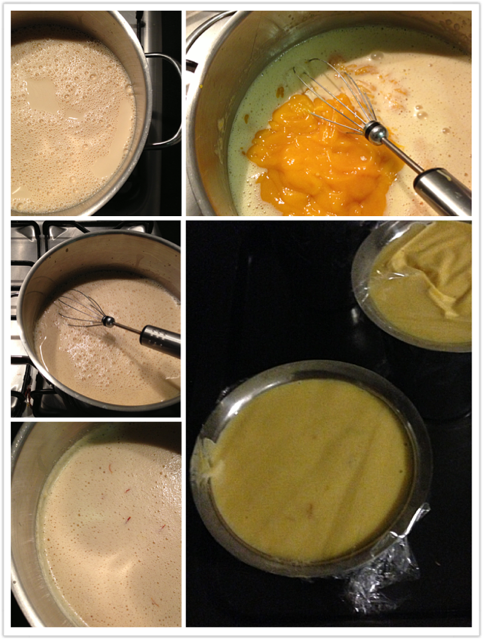
Whip heavy cream until it forms soft peaks then add in cream cheese, pulp, sugar and gelatin, mix well until  smooth and well combined.


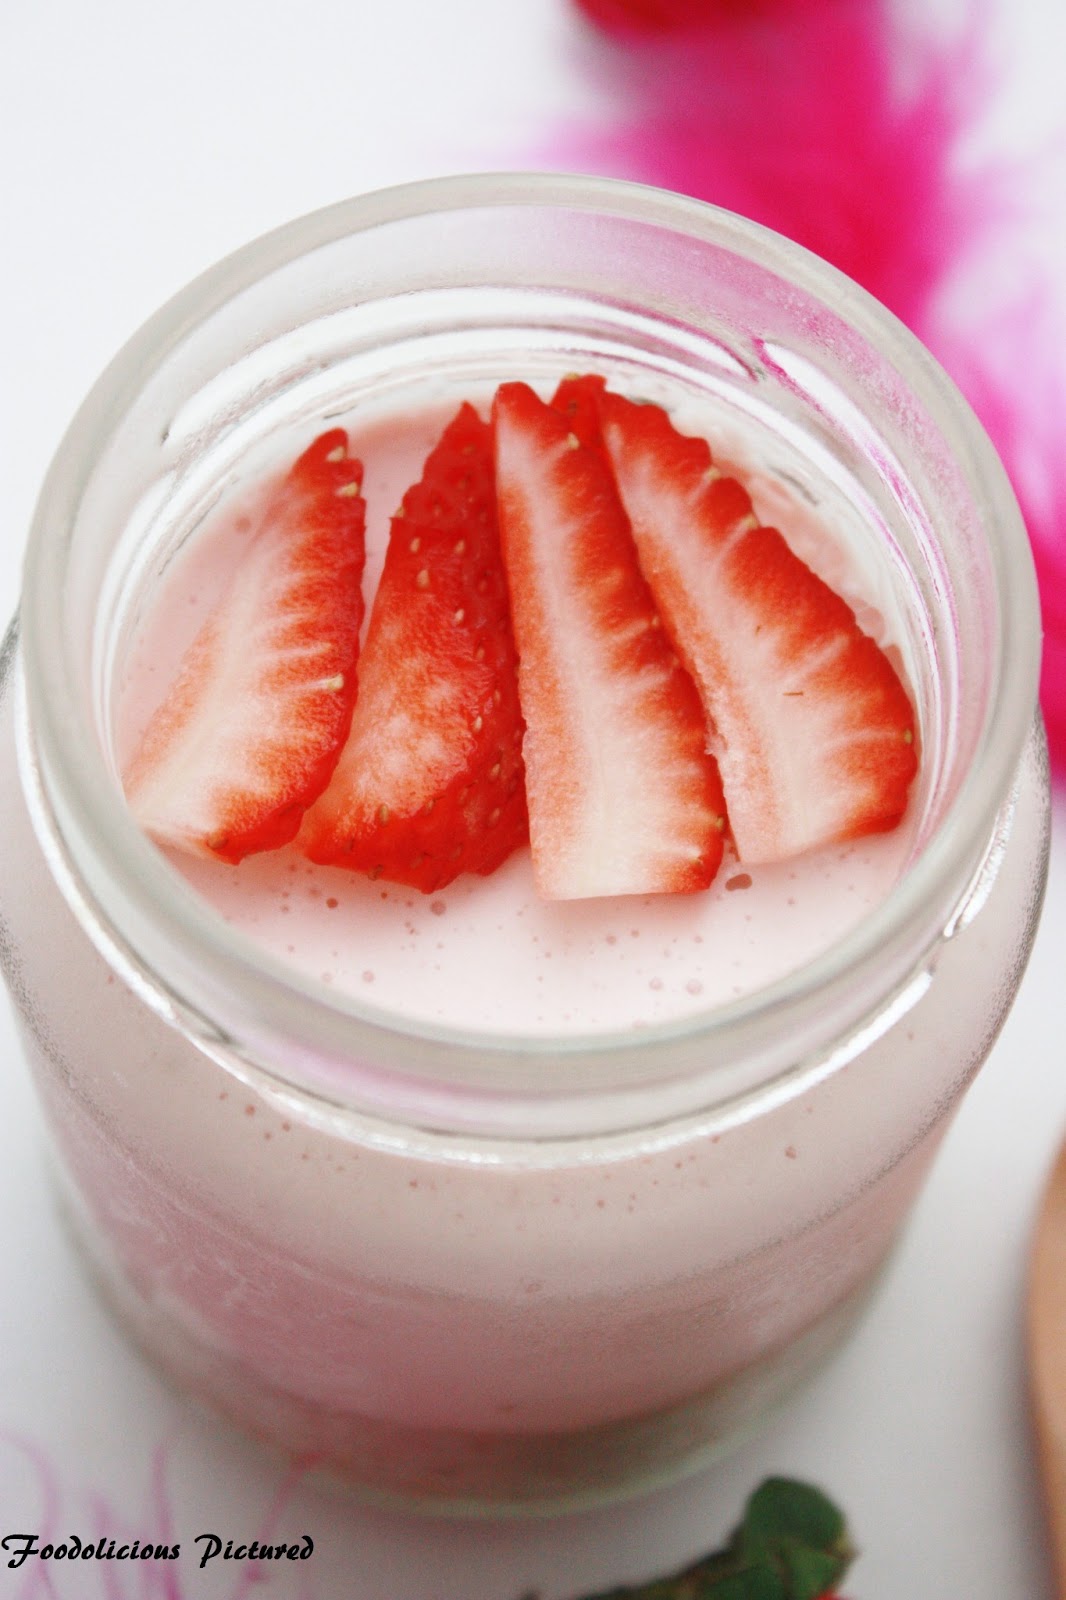
Spoon the cream cheese mixture into the jars/containers and refrigerate for about 2 hours.

Add chopped fresh strawberries on top before serving.


Mango-saffron kulfi

I can’t get enough of the Mangoes… Well most of the time we end up eating fresh mangoes and don’t want to make anything of it or rather I have no patience. The other day I happened to find some Indian kesar Mangoes. Picked up a few to make kulfis.
 
The recipe is from one of my cook books. It was creamy and the nutty flavor was just so perfect to bring back the memories of my childhood in Bangalore where I grew up.   There was a guy who would pop-up during the summer selling kulfi’s and we friends feasted on them. I still remember he would come on bicycle with huge clay pot sitting at the back of the cycle and covered with a red cloth all through summer and once the season was over we never saw until the year.
 
Well cherished memories… Something you never want to let go off!
Over to the recipe, I have used steel glasses as I didn’t have the traditional kulfi molds. I was keen on getting the cylindrical shape so the steel glass was perfect. But you can use the regular popsicle molds.
You need –
  • Mango puree – 2 cups ( I used 3 big mangoes)
  • Canned evaporated milk – 400 grams
  • Single cream – 200 mls
  • Saffron strands – 1 teaspoon
  • Ground almonds – 25 grams
  • Granulated sugar – 75 grams or as per your taste
  • Freshly ground cardamom seeds – ¼ teaspoon
  • Roasted pistachio nuts to garnish
How to – 
 
Puree the mangoes in a blender and pass through the sieve. Set aside. 
 
In heavy bottom sauce pan, pour the evaporated milk, cream and stir well. Put over a medium heat. In a bowl mix the almonds, sugar and add to the milk and cream mixture. Cook stirring constantly for 5-6 minutes or until the mixture thickens slightly. Turn of the heat add the saffron strands and allow the mixture to cool completely, stirring frequently 
ensuring no skin if formed. Once cooled completely add the Mango puree, ground cardamom  and mix well.
 
 
Pour the mixture into the molds and cover with cling wrap. Freeze for 5-6 hours or overnight. Transfer the kulfi to the refrigerator for 30 minutes then invert onto a serving dish. 
Garnish with crushed pistachios and serve.
Sending this recipe to Giveaway Summer ’13 Drinks & Desserts by Gurus Cooking
Summer Drinks and Desserts Giveaway

Blueberry and yogurt Popsicle – Celebrating mother’s day and my 150th post..:-)

 
My daughter and I seem to have similar tastes in life, with food particularly. So when I decided to make popsicles; we were equally excited. Well the only thing is she was sitting by the clock to constantly check the time, so the popsicles would be ready.  It wasn’t easy to patiently answer her only Q –“is it time for the popsicle?!!”, whole of last evening and through this morning. Its maddening at times but yet I have learned to be polite to my best and the person who has taken by complete surprise of this change in me is obviously my Mom.  Well MOM’s the word 🙂
 
 
This morning I come-up with an idea but didn’t realize handing Saana a popsicle and asking her to do a photo-shoot for my post wasn’t as easy as I thought.. It ended with a statement “MOM! You are not my friend anymore” 🙂
 
Moving to the recipe, I like this healthy Popsicle  Greek yogurt and berries is sure a thing to boast off.  So go ahead and beat the heat with his healthy and delicious pops. It was  bright and wonderful this morning, that I couldn’t stop clicking pictures hence little more pictures 🙂
 
 You need –
  • Greek yogurt – 1 ½ cups
  • Blueberries – 150 grams
  • Sugar – ¼ cup or as per your taste
  • Vanilla essence – ½ teaspoon
How to –
 
In a blender, blend the sugar and blueberries till smooth. In a blow beat the yogurt and vanilla essence.
Add the blueberry mixture and mix well till well combined. Pour  into the molds and freeze for at least 5 hours or till set.


To un-mold, run the molds in warm water for a few seconds while gently pulling the popsicle stick.


Chocolate-orange cake with cream cheese frosting


Cake recipe from goodtoknow.co.uk. 

You need –
For the cake
  • Eggs – 4
  • Caster sugar – 150 grams
  • All-purpose flour – 190 grams
  • Cocoa powder – 50 grams
  • Baking powder – 1 teaspoon
  • Olive oil – 100 ml
  • Grated zest of 1 oranges
  • Juice of 1 orange

For the cream cheese frosting
  • Cream cheese – 8 oz
  • Unsalted butter – ½ cup
  • Icing sugar – 2- 2 ½ cups 
  • Vanilla essence – 1 teaspoon

How to –

Cake

Preheat the oven to 180ºC. Line a 20cm (8-inch) round cake tin with lightly oiled baking parchment paper.


In a heat proof large bowl place the egg and sugar over a pan if simmering water. Whisk the egg mixture with an electric whisk till creamy and thick
Place the eggs and sugar in a large bowl, over a pan of simmering water. Use an electric whisk to whisk the eggs until creamy and thick, enough to leave a trail when you lift the whisk from the mixture.


Sift in the flour, cocoa baking powder and gently fold in. When the flour is almost mixed in, add the olive oil, orange zest and juice and continue to fold in gently till well combined.
Pour into the prepared tin and bake for 20-25 mins or till done.  Cool in the tin for 10 mins before transferring to a wire rack to cool.


Frosting

In electric beater beat the cheese ,butter and vanilla essence till light and fluffy. Add the sugar gradually, beating well after each addition till you get the desired thickness.
Once the cake is completely cooled, frost the cake as per your choice and serve.

Creamy lime pie


You need –
  • Creamy lime pie
  • Fresh lime juice – ¾ cup
  • Cream cheese – 500 grams @ room temperature
  • Condensed milk – 400 ml
  • Pastry shell – 1
  • Double cream – 250 ml
  • Confectioners/icing sugar – ¼ cup
  • Lime – 1 to garnish


How to –

In a bowl, beat together the lime juice, cream cheese and condensed milk until smooth.  Pour this mixture into  the pastry shell and refrigerate.

In another bowl, whisk together the cream and icing sugar till soft peaks form. Spread this mixture to the pie. Create swirls and peaks.

Garnish with thinly sliced lime. Cover the pie loosely and chill for 6 hours or over night before serving.


Palpayasam

…And it’s my 100thpost… # celebration!!!
Thank you for the incredible support you have given me. It has been a wonderful journey. Enjoying every bit… Cooking up, styling and photography.  Each recipe has been a learning in every way. 


And the recipe for the palpayasam…


You need –
  • Milk – 1 litre
  • Rice – ½ cup, washed, cleaned and drained
  • Sugar – ½ cup
  • Condensed milk – ¼ cup
  • Cardamamon – 2 nos
  • Fried cashew nuts – to garish
How to
In a heavy sauce pan, bring the milk and water to boil. Add the rice, cardamom, and cook till the rice is done. Reduce the heat to low and continue to cook till the milk thickens. You will need to stir continuously. Add the sugar and condensed milk and mix well. Turn off the heat cover the payasam for an hour. During this time do not stir or uncover the payasam.
After an hour serve the payasam.


Chocolate truffles

 
Whenever we have guests over, I prefer to prepare ahead so that I get to spend quality time with them, which means do-ahead recipes ring in.. This is one of those desserts which can be done much before and tucked in the fridge.  A treat for the all the chocolate lovers!!

You need –

  • Heavy cream – 250 grams
  • Dark chocolate (70% coco content) – 300 grams
  • Unsalted butter – 20 grams
  • Orange Juice – 2 tablespoons
  • Cocoa powder – for coating. Sifted
How to-
 
Chop the chocolate and leave in a bowl. Bring the cream to a brisk simmer and pour into the chocolate. Allow the hot cream to melt the chocolate (for a minute or so).  Slowly whisk the chocolate – cream mixture till smooth, thick and glossy. 

Stir in the butter while the chocolate mixture is warm. Mix in the orange juice. Stir well to combine and refrigerate until firm. Scoop out 1 tablespoon of the mixture and roll into balls using your palms. Coat each ball with cocoa powder and refrigerate to set again before you serve.


Chocolate terrine with raspberry sauce

This elegant dessert adapted from a cook book is “to die for”… Its perfect when you have guests over since this is a do-ahead dessert as it needs to be refrigerated atleast for 12 hrs before you serve. 


You need –
  • Dark chocolate – 400 grams
  • Butter – 125 grams
  • Egg yolk – 4
  • Icing sugar – 75 grams
  • Ground cinimamon – ½ teaspoon
  • Thick cream – 500 mls
  • Vanilla essence – ½ teaspoon

For the raspberry sauce

  • Raspberries – 1 cup
  • Icing sugar – 3 tablespoon
  • Orange juice – 1 tablespoon

How to –
  • Melt the chocolate either double boiler or microwave. Add the butter and stir until smooth.
  • In Bowl using an electric mixer beat the egg yolks, icing sugar and cinnamon until foamy.
  • Beat in the chocolate mixture and set aside.
  • In another bowl whip the cream. Add the vanilla essence and continue to whip until soft peaks. Fold it into the chocolate mixture.
  • Prepare a 11’ inch cake mold with wax paper. Pour the mixture in, cover and refrigerate for 12-24 hours.

To make the sauce
  • Puree the berries in blender. Pass through a fine sieve into a bowl. Discard the seeds.
  • Stir in sugar and orange juice. Cover and refrigerate.

Simple n Easy Apple Cake

                                 Simple n Easy Apple Cake

You need – 
  • Self raising flour, sifted – 1 ½ cups
  • Caster sugar – ¾  cup
  • Butter, softened – 125g
  • Eggs – 2
  • Milk – ½ cup
  • vanilla extract – 1 teaspoon
  • Apple, thinly sliced – 1
  • Sugar – 1 tablespoon

How to
  • Preheat oven to 160C
  • In a mixing bowl, place the flour, sugar, butter, vanilla, eggs and milk and beat until combined.
  • Spoon the mixture into a greased 22cm spring-form tin lined with non-stick baking paper. Top with the apples and sprinkle with sugar.
  • Bake for 45 minutes or until done.
Serve with vanilla ice-cream or double cream..